A few week’s back, while perusing the Aisle of Shame at Aldi, I stumbled on a Halloween-themed crochet kit to make your own ghost scene. It was too cute and inexpensive to pass up, so I tossed it in the cart alongside my other regularly-scheduled groceries. After getting it home, I thought it would be fun to post an honest review of how the kit went – sort of a live-reaction style video that captured how I was feeling and my overall impressions of the kit.
It was really fun and a great change of pace from my normal content! However, the original pattern for the witch hat was pretty bad! So I decided to share my own witch’s hat pattern, so anyone else who’d like a better hat for their ghost (or for any reason, really – the hat’s pretty cute to add to your Halloween decor!) would be able to make one.
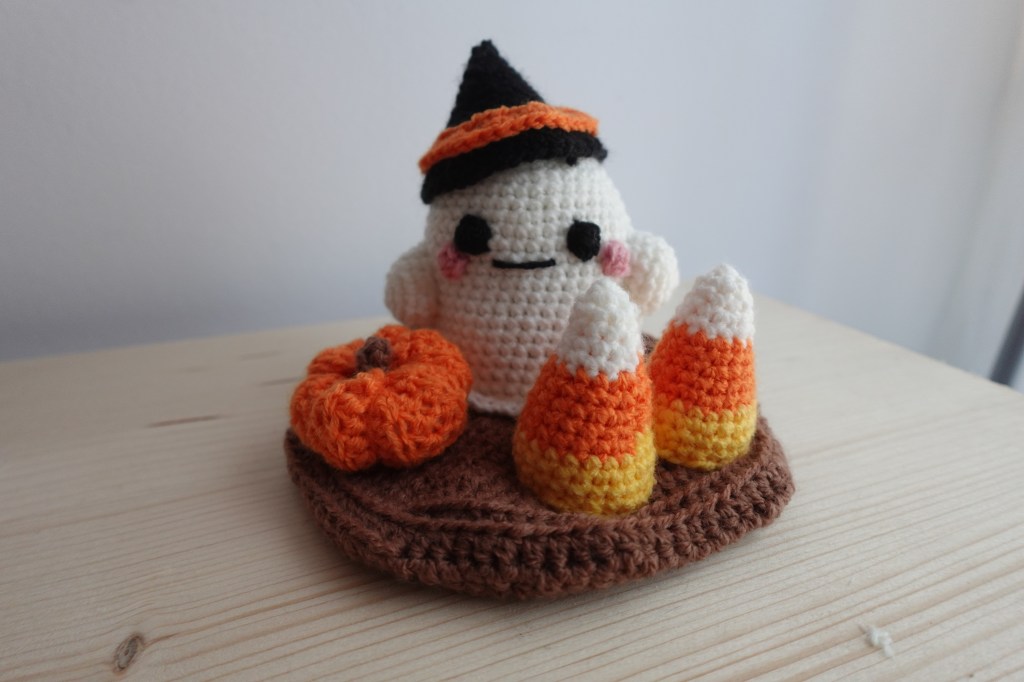
Here’s the original kit, as written, with the hat in question:
And here’s the same kit, with my updated hat pattern:
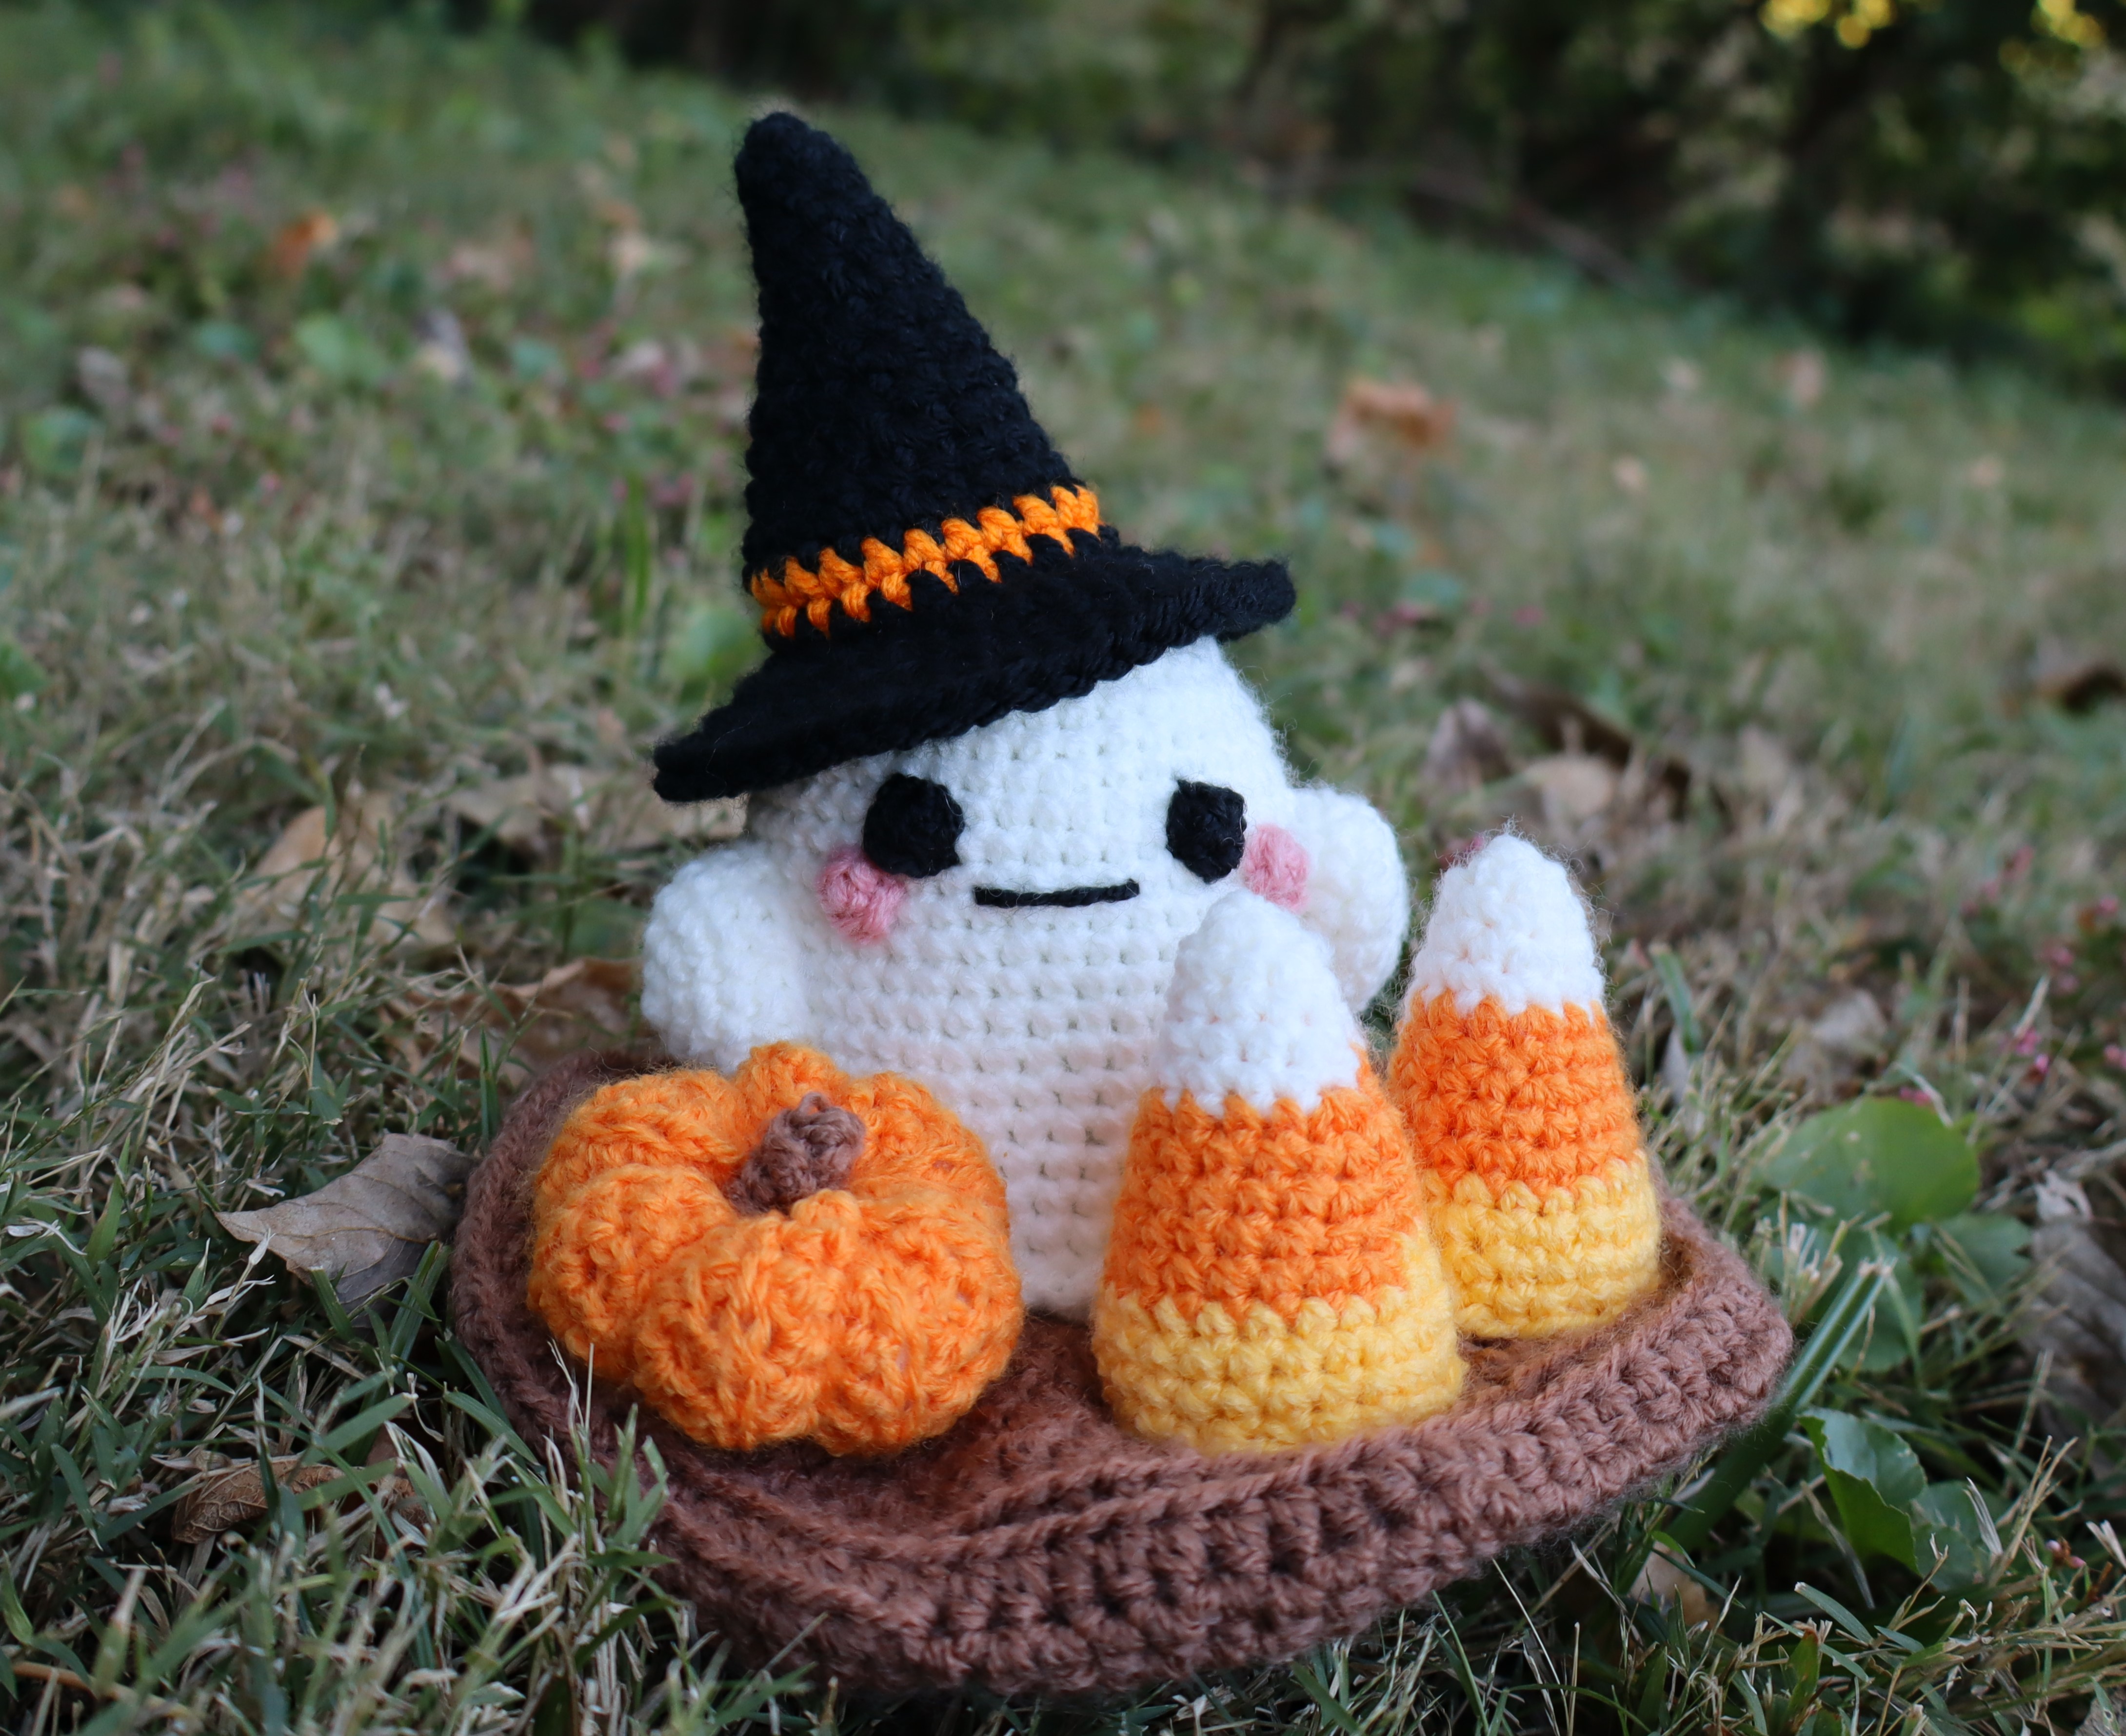
I feel it’s a pretty noticeable improvement! Okay, let’s get to the pattern!
YouTube Pattern Video
Below you’ll find the pattern video. I use YouTube’s “Chapters” feature to sort each individual instruction (rounds, sewing, sections, etc.) into a time stamped section. You should be able to see the chapters in the timeline/seek bar of the video below, but if you click over to YouTube, you’ll be able to pull the chapters up and move more easily between them.
As always, with the pattern write-up here on my blog, the written instructions are “bare bones” – they’re designed to work hand-in-hand with the video tutorial, so there aren’t a lot of images or descriptive language. If you’re having any issues, please refer to the video! I work hard to make them as clear as possible.
If the video still doesn’t answer your questions, drop me a comment here on the blog or over on the video on YouTube, and I’ll see if I can help you out. 👍
Concepts
Here are all of the various concepts used in this pattern. Based on the combination of all the concepts listed, I’d grade this pattern as a beginner pattern. You’ll want to be comfortable with:
- Forming a magic ring/loop
- Working single crochet stitches, increases, BLO, and slp sts
- Very basic color changes
However, as with all of my tutorials, I’ll guide you through each step to the best of my ability. Don’t be afraid to give it a try, as I try to do a pretty good job going slow to help you master new concepts. 😍
Materials
- Worsted weight yarn in your main color and accent color – for me, I’ll be using black as my main color and orange as my accent color.
- You won’t need much yarn. I used approximately 10g/~6yds of my main color and less than a gram of the accent color!
- 4.5mm crochet hook
- A little stuffing, if you’re sewing the hat on a crochet project
- A tapestry/yarn needle and scissors
Pattern Notes
All of my patterns are written with US terminology.
We’ll be working with a chain and in the round on this pattern. You’ll work down the chain, make a certain amount of stitches at the end to help you “rotate,” and then work back up along the other side of the chain. Your work will not be turned.
Abbreviations
These are my most commonly used abbreviations. Any special stitches or exceptions will be denoted in the pattern as they appear!
| rnd(s) | round(s) |
| sc | single crochet |
| MR/ML/MC | magic ring, magic loop, magic circle |
| ( ) | number of stitches at the end of each round |
| * * | repeat instructions between in the order they appear, the indicated amount of times |
| inc | increase (typically single crochet – otherwise denoted) |
| dec | decrease (typically single crochet – otherwise denoted) |
| BLO | work in the back loop only |
| FLO | work in the front loop only |
| slp st | slip stitch |
| dc | double crochet |
| hdc | half double crochet |
| ch | chain |
| st(s) | stitch(es) |
| YO | yarn over |
| [ ] | special instructions/notes |
| sk | skip |
Pattern
Hat
In main color yarn, ML 3sc
Rnd 1: *inc* x 3 (6)
Rnd 2: sc around [1 rnd sc total]
Rnd 3: *1 sc, inc* x 3 (9)
Rnd 4: sc around [1 rnd sc total]
Rnd 5: *2 sc, inc* x 3 (12)
Rnd 6: sc around [1 rnd sc total]
Rnd 7: *3 sc, inc* x 3 (15)
Rnd 8: sc around [1 rnd sc total]
Rnd 9: *4 sc, inc* x 3 (18)
Rnd 10: sc around [1 rnd sc total]
Rnd 11: *2 sc, inc* x 6 (24)
Change to hat band color here, leaving the main color attached.
Rnds 12-13: sc around [2 rnds sc total]
Switch back to the main color yarn here. Fasten off hat band color and weave in tail as you work.
Rnd 14: working in FLO, *3 sc, inc* x 6 (30)
Rnd 15: *4 sc, inc* x 6 (36) – or invisible increase, if desired (see video!)
Rnd 16: *5 sc, inc* x 6 (42)
Rnd 17: *6 sc, inc* x 6 (48)
Rnd 18: sc around [1 rnd sc total]
Fasten off by slp st to 1st stitch of Rnd 18. Cut a long tail and pull through to close. I like to use this tail to sew the hat on to whatever I’m adding it to – simply weave the tail up to where the BLO round is on the underside of the hat and you’re ready to sew! I also like to add some stuffing to the cone of the hat before I attach it to help it keep it’s shape.
Complete!
As always, thanks for tuning in. If you haven’t already checked out my YouTube page, I’d be forever grateful if you’d consider subscribing or watching my other tutorial videos. I try to post twice a month with a new tutorial!
Normal, obligatory legal banter:
Please, if you’d like to share this pattern, link folks directly to this blog page, or to the video on YouTube. I work really hard on my patterns and post them for free – please don’t copy my stuff and sell it as your own pattern! You can make and sell items made from this pattern – and while I would love a mention on the listing or a link back to my blog, it’s not a requirement.
Have an Instagram and want to post your new make? Tag me (@pixeledpeach) so I can see and promote your page!