Right at the start of the year, I flew to New Orleans to visit my mother, who recently moved there. It was my first visit to her new house, and the second time I’ve ever been to New Orleans – the first was nearly ten years ago, and I don’t remember much of it (as it was a short visit).
While sitting in a local seafood restaurant eating oysters, I noticed that the Christmas decorations were still up. Between the large globe ornaments on the ceiling and garland and bows on the walls, I noticed an extremely adorable snowman wood cut sign that I’d never seen before.
I asked about him, and found out that he’s a bit of a New Orleans tradition called “Mr. Bingle.” I’d never heard of him before, but thought he was so adorable!
When I returned from my visit, I decided to try and crochet my very own Mr. Bingle.
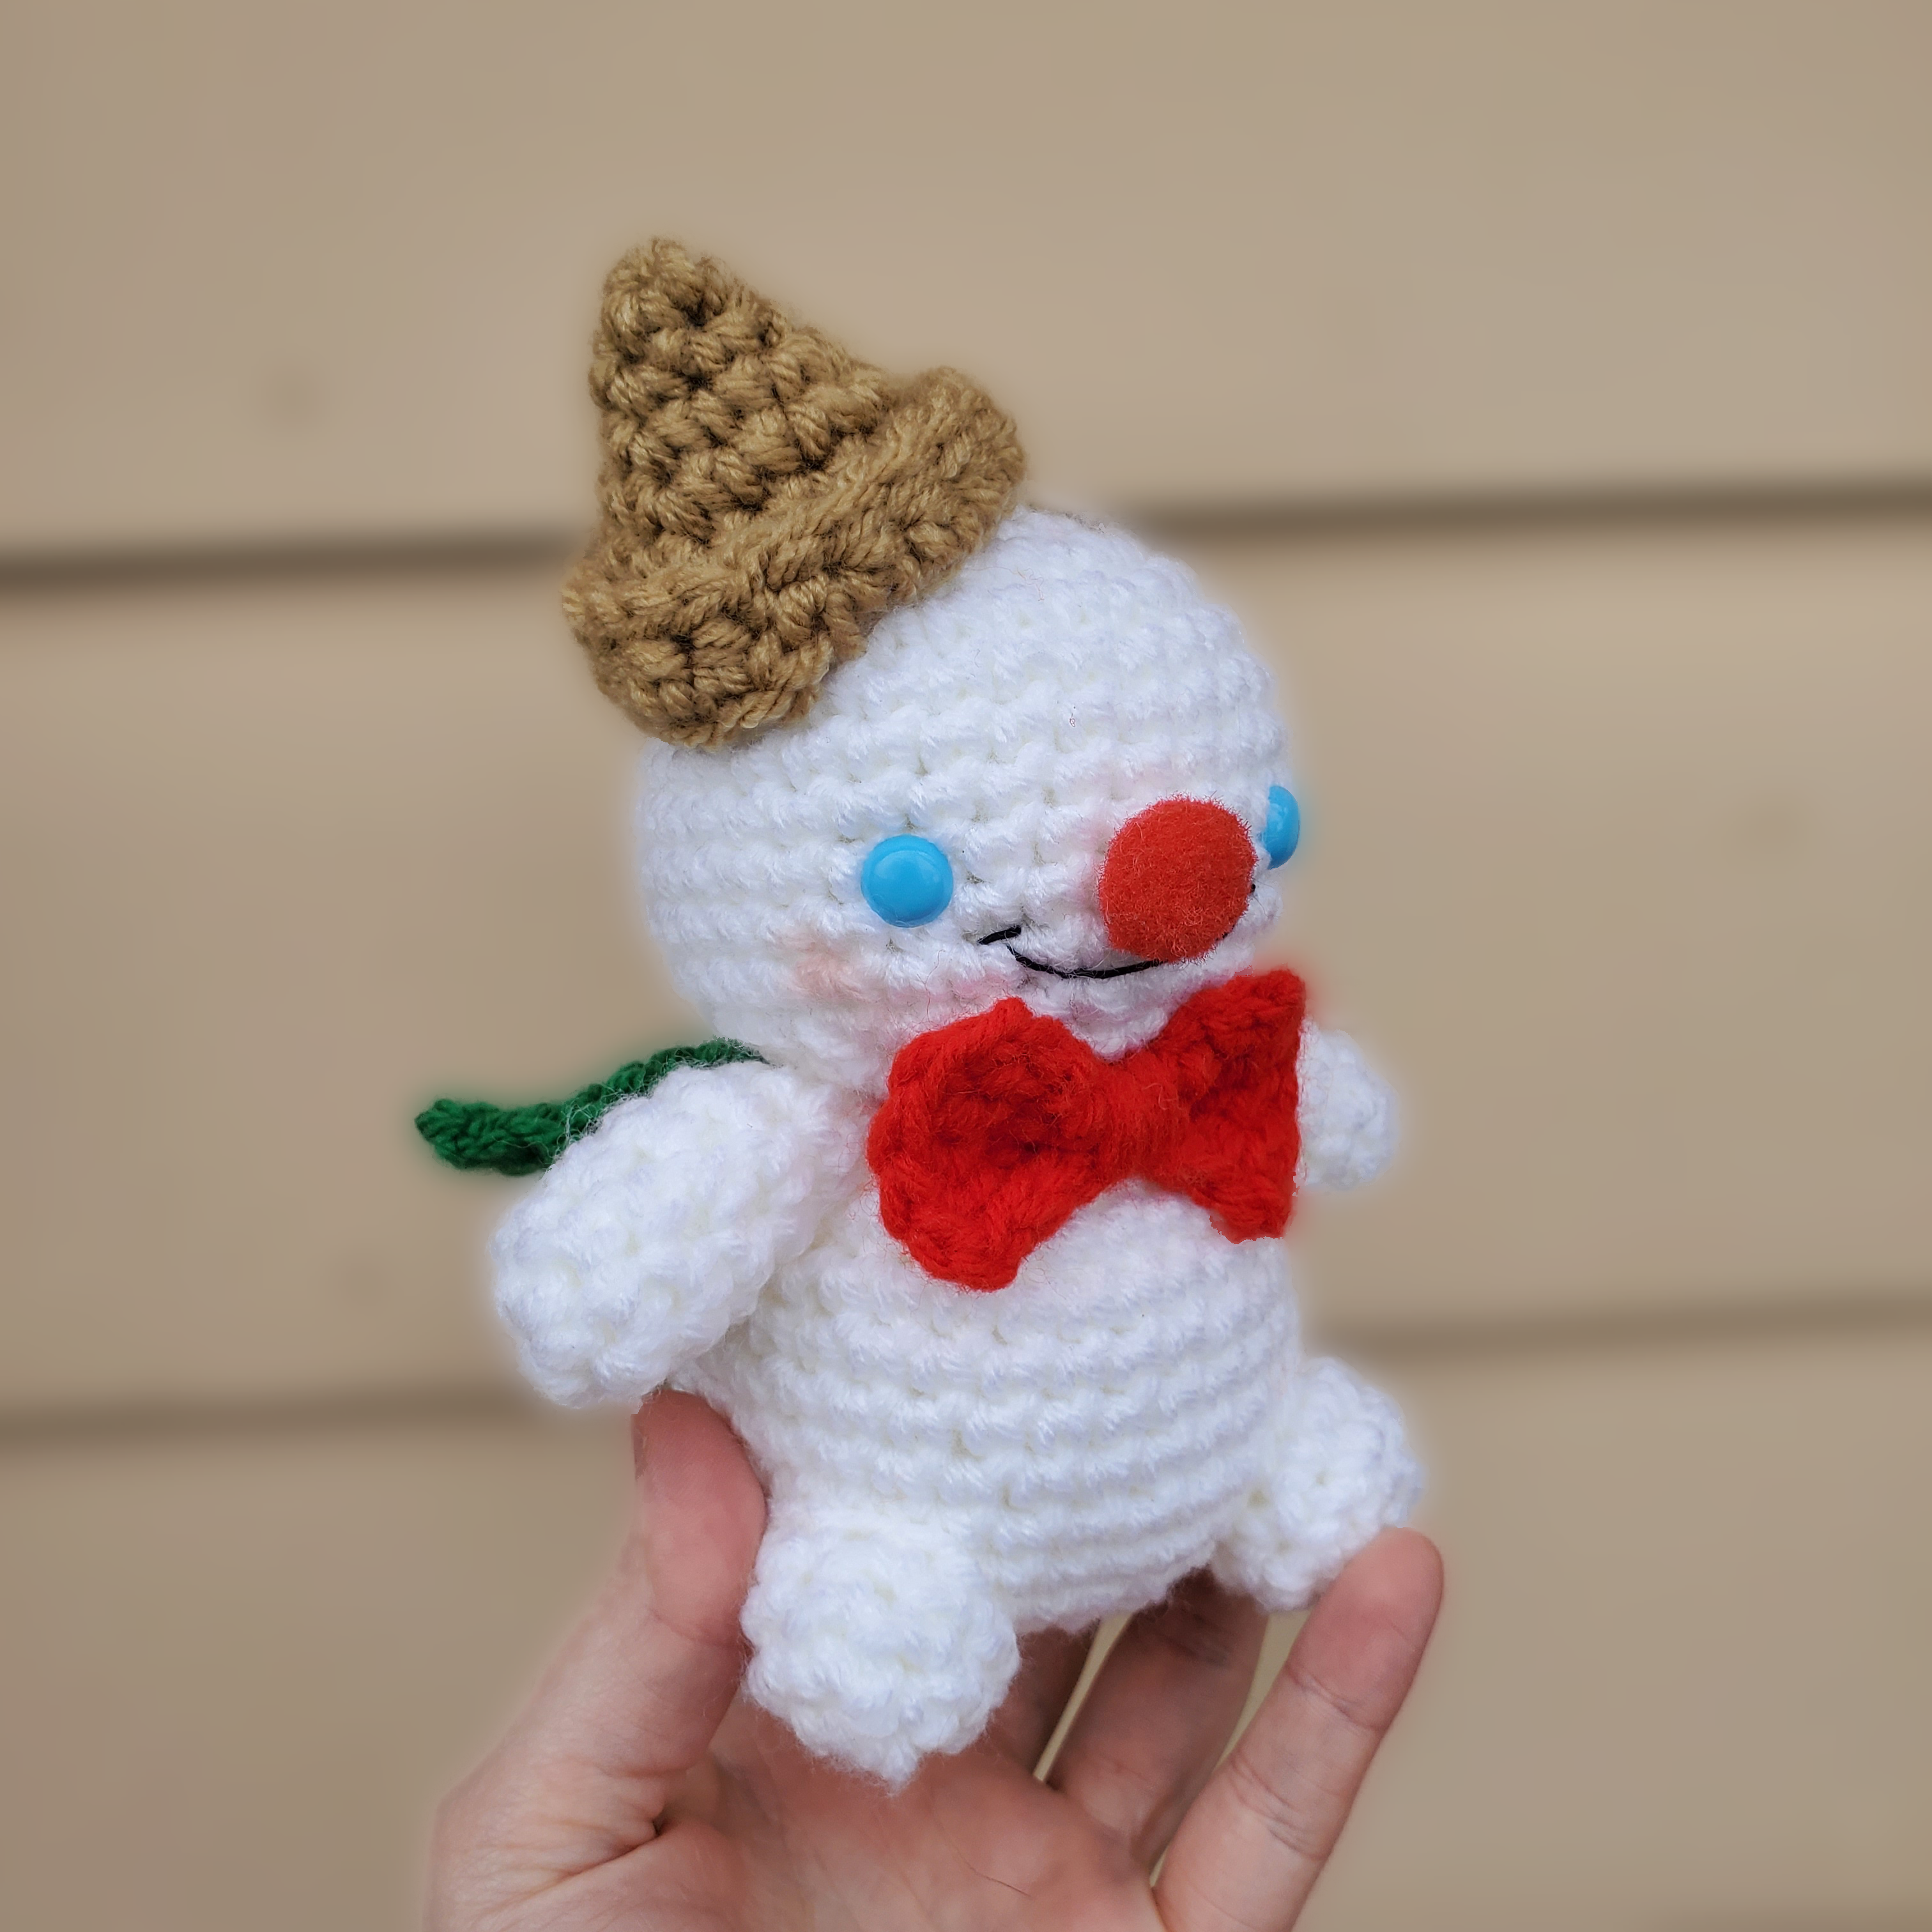
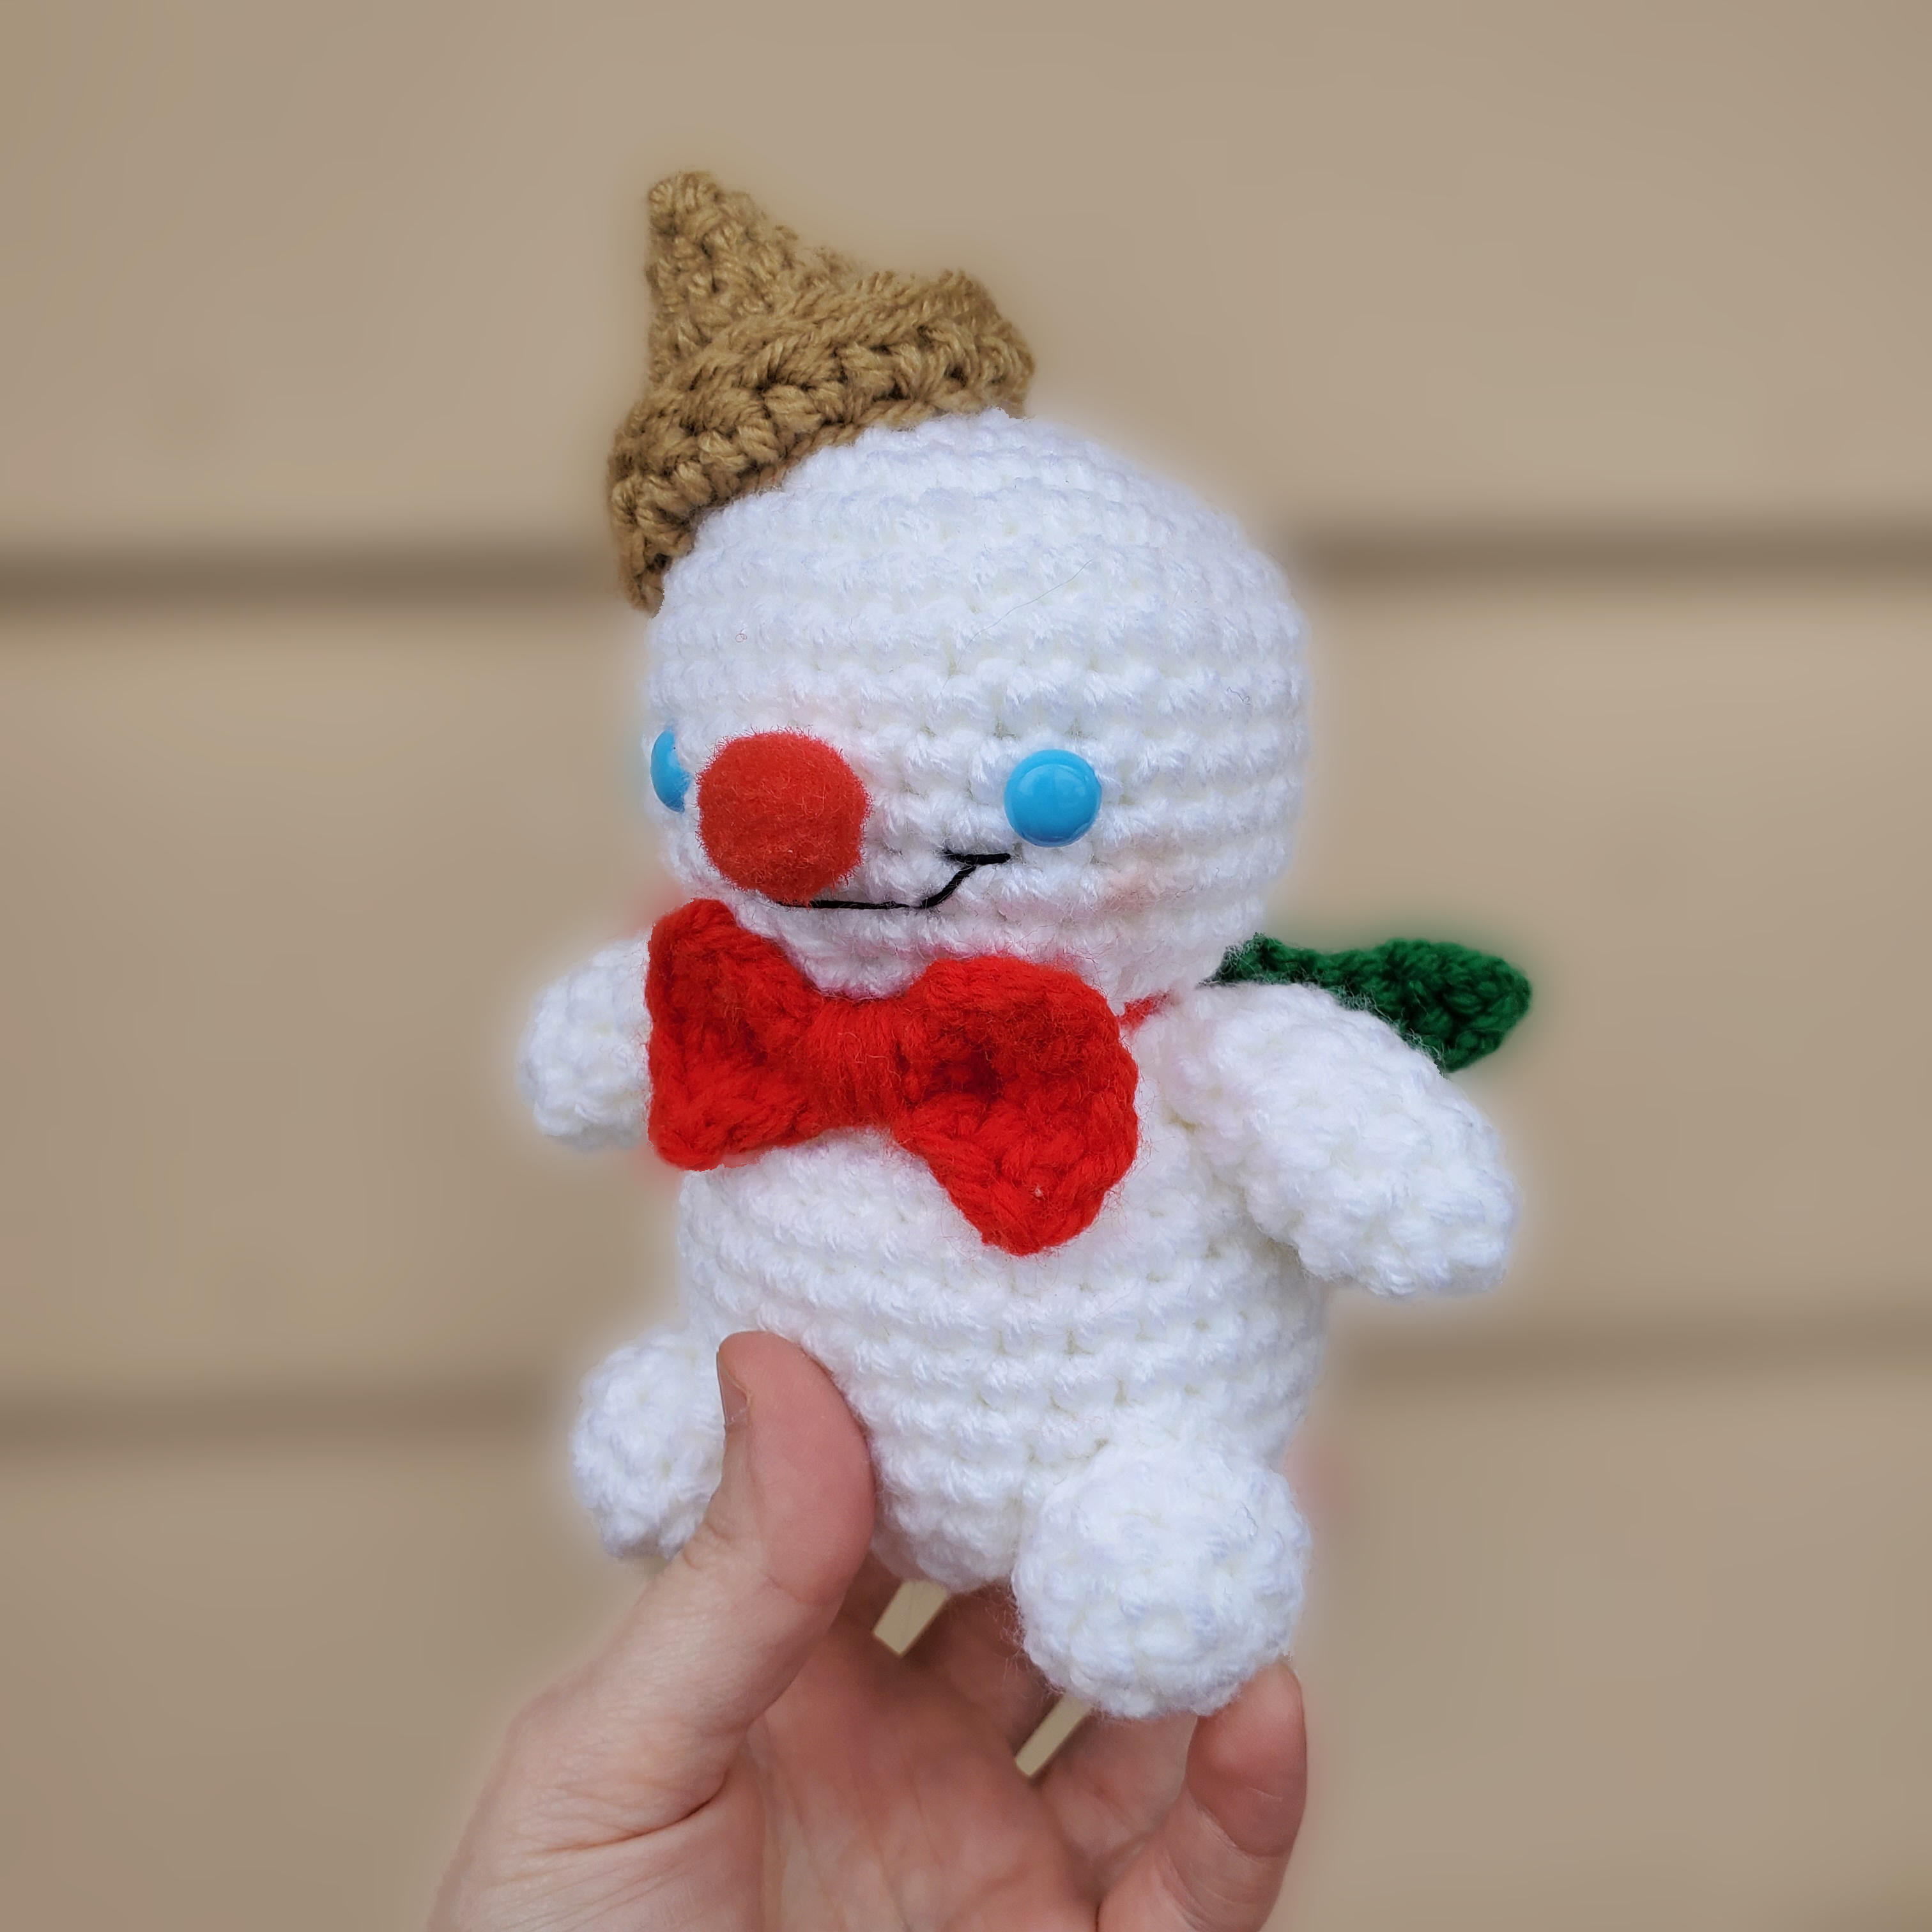
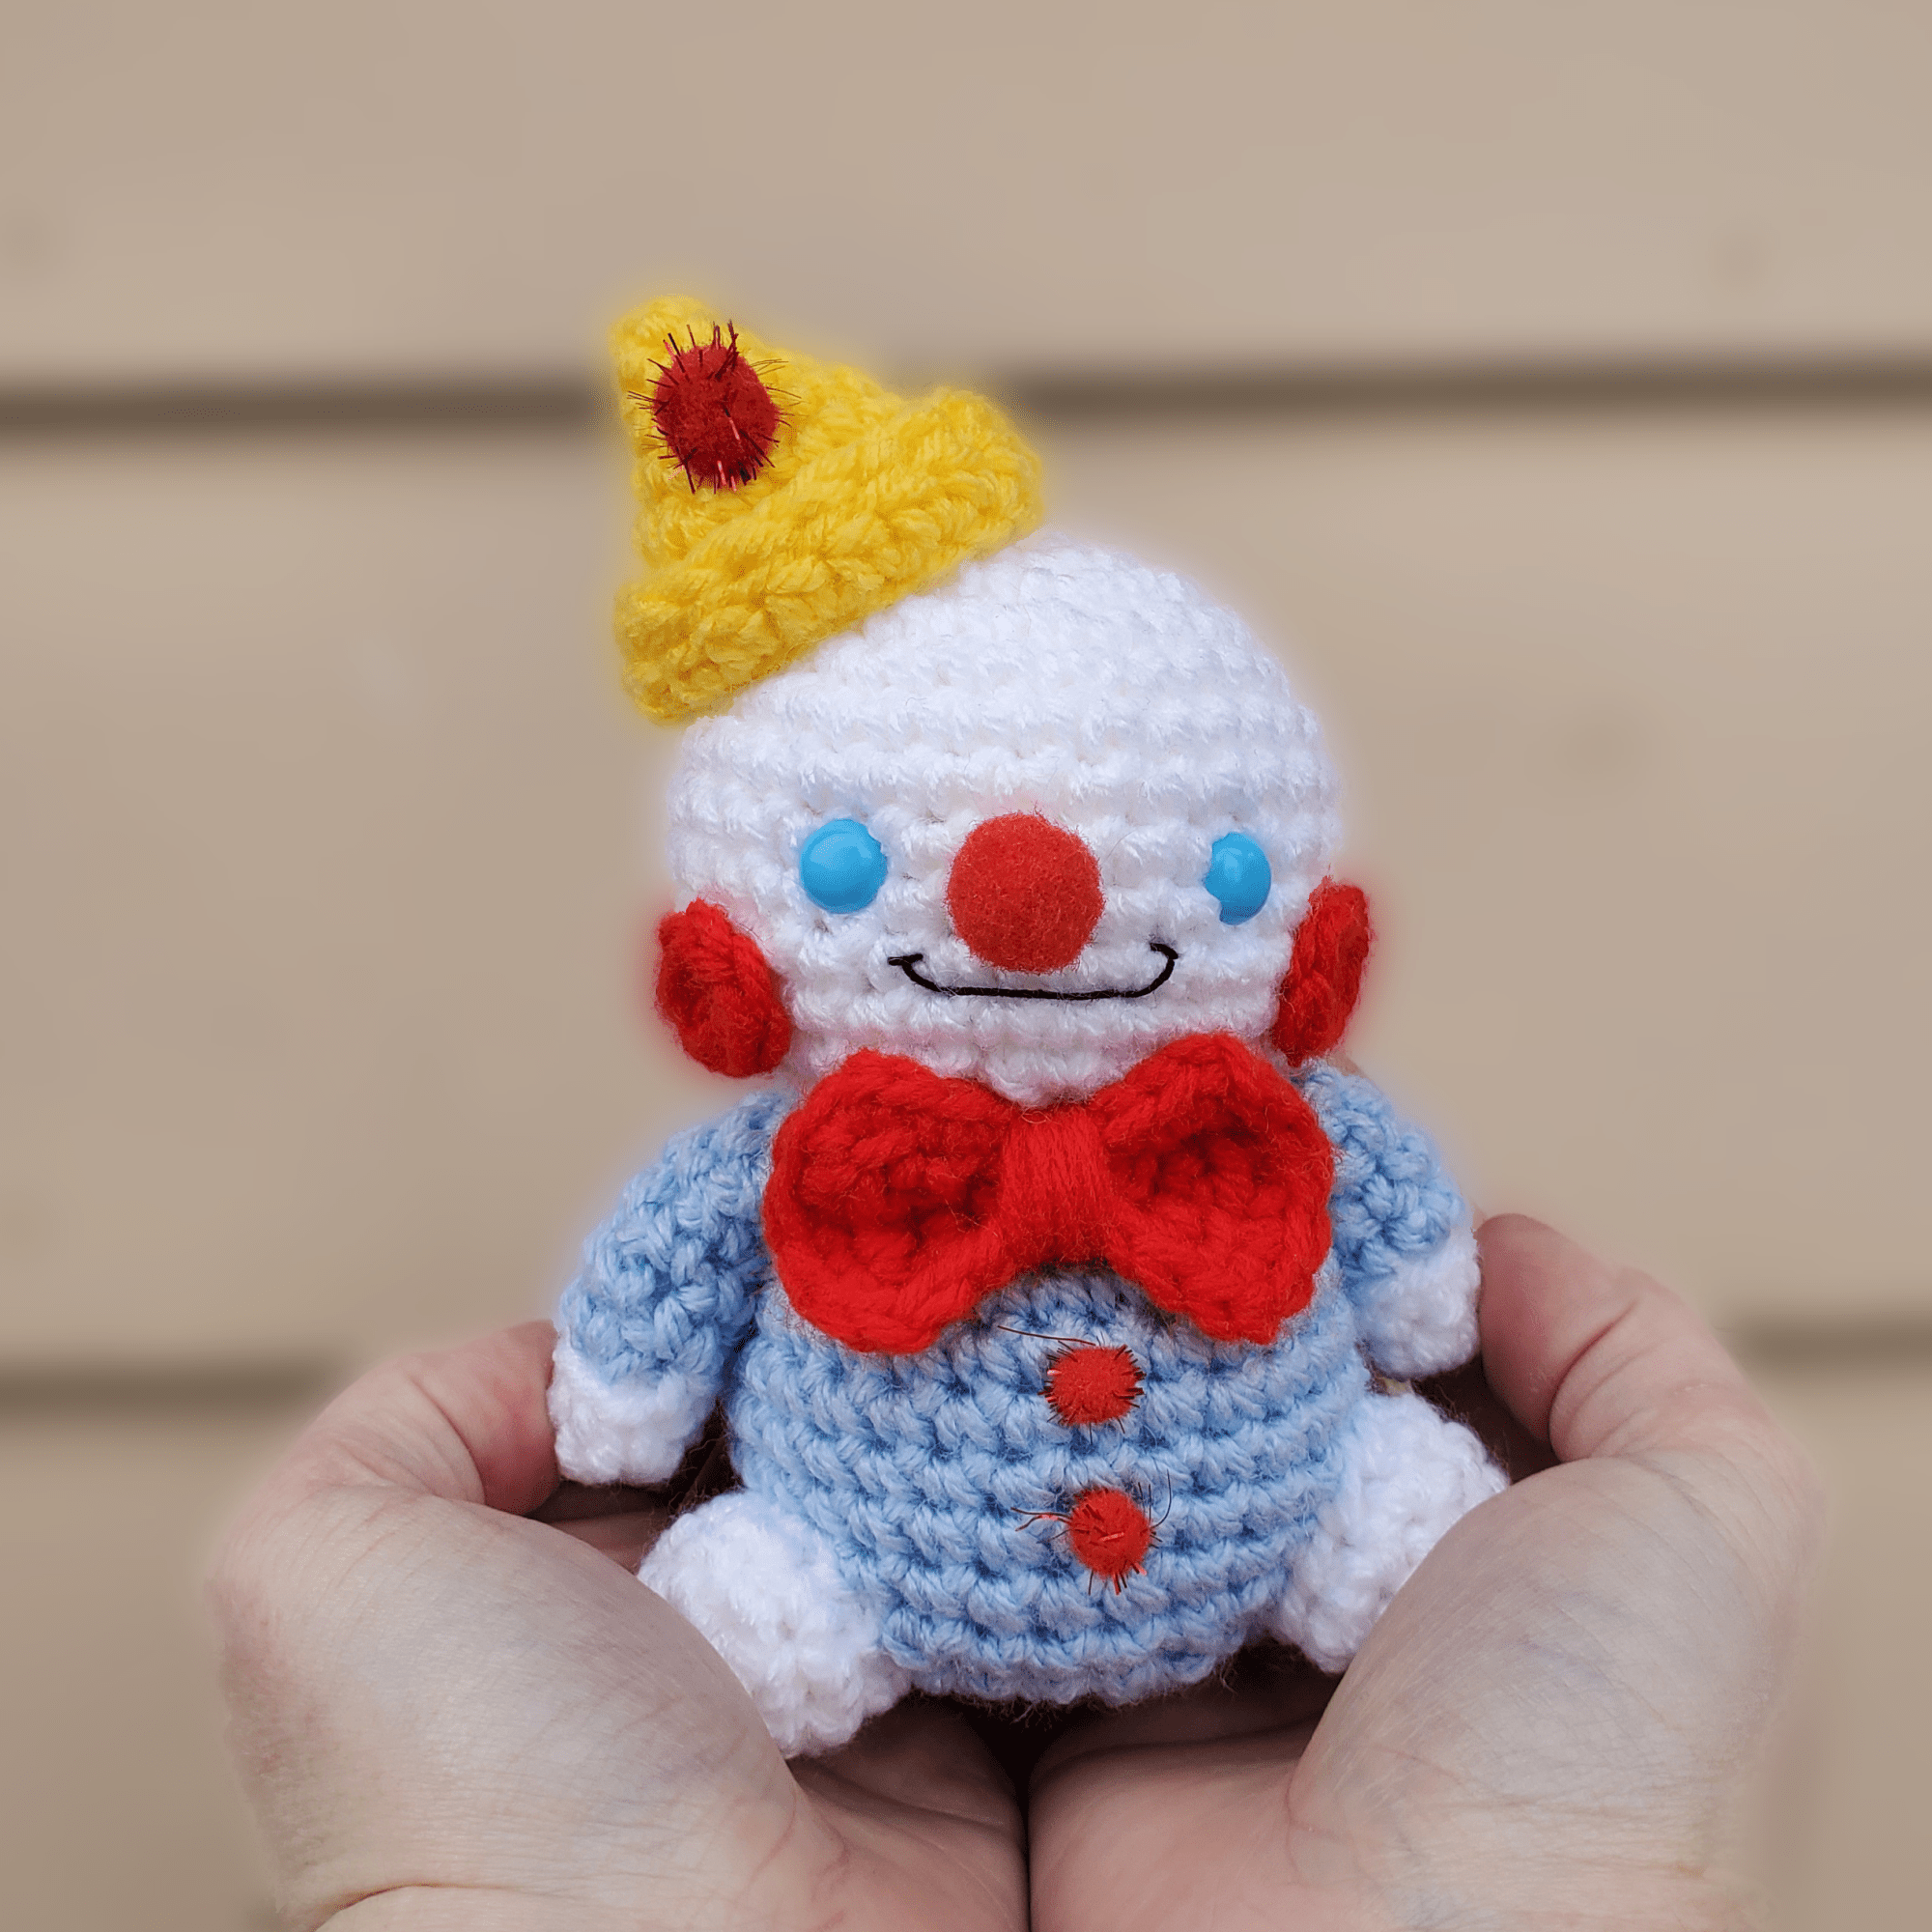
As I’m sure is very obvious, Pietro’s design is based on my results for Mr. Bingle! I love the little cone hat set at a jaunty angle and the puffball used for his nose – and, of course, his charming little bow tie! I knew I absolutely had to make him into a plush.

Video Tutorial
As with most of my newer patterns, here is the video tutorial – below, you’ll find a rudimentary written out pattern to follow.
I highly recommend using the video and the written pattern together, especially if you’re a beginning crocheter who’s not used to reading patterns, but also during some of the trickier bits on the pattern’s construction. You know how they say a picture’s worth a thousand words? A video is worth a thousand pictures!
If you view the video directly on YouTube, you’ll be able to see all of the time stamps for each section.
Pattern
Ingredients

Abbreviations
Some of these may not be used in the pattern – these are the stitches that I use most frequently! If you see an abbreviation that you are unfamiliar with, please refer back to this chart.

Head
Start with white yarn
R1: ML 6sc
R2: inc in each st (12)
R3: *sc, inc* (18)
R4: *2sc, inc* (24)
R5: *3sc, inc* (30)
R6 – R11: sc around (6 rounds total)
R12: *3sc, dec* (24)
R13: *2sc, dec* (18)
R14: *sc, dec* (12)
Add eyes here, in between rows 9 and 10, about 5 stitches apart. Stuff head.
R15: dec in all st (6)
Fasten off, leaving long tail for sewing.
Face Details
Glue puffball nose on with hot glue gun. Embroider mouth with black embroidery thread.
Cheeks
Make 2 using red yarn
R1: ML 6sc
Fasten off and weave in tail. Hot glue cheeks to face.
Hat
Use yellow yarn
R1: ML 3sc
R2: inc in each st (6)
R3: *sc, inc* (9)
R4: *2sc, inc* (12)
R5: *3sc, inc* (15)
R6: *4sc, inc* (18)
R7: sc around
R8: Slp st to first stitch of R7 to close, then ch 2. Turn work, then BLOhdc in each stitch along the brim of the hat. Slp st to first hdc to close round.
R9: Slp st around
Fasten off, and weave in all tail ends. Stuff hat lightly, then hot glue to top of head at an angle. Hot glue puffball to front of hat.
Body
Use blue yarn here
R1: ML 6sc
R2: inc in each st (12)
R3: *sc, inc* (18)
R4: *2sc, inc* (24)
R5: *3sc, inc* (30)
R6 – R11: sc around (6 rounds total)
R12: *3sc, dec* (24)
R13: *2sc, dec* (18)
R14: *sc, dec* (12)
Stuff body here.
R15: dec in all st (6)
Fasten off, cinch remaining 6 sts, and weave in all ends. Attach head to body with tail end from head by whip stitching all the way around. Tie knot and weave in tail end from head.
Bow Tie + Puffball Buttons
Use red yarn
R1: Ch 8
R2: turn, and sc down chain
R3 – R5: sc in each st
R6: sc around border of bow tie, chaining 1 st to turn the corners. On last side, slp st and stop halfway through. Cut long tail, and wrap it around and around the center of the bow tie, cinching it and creating the middle part of the tie. Tie knot on back of bow tie to secure wraps.
Use remaining tail end to sew bow tie around neck. Secure both sides with a straight stitch directly into fabric of body. Once secured, tie a knot and weave in the remaining tail end.
Once bow tie is attached, hot glue the puffball buttons on directly underneath.
Arms
Make two using white then blue yarn
R1: ML 6sc
R2 – R3: sc around – change colors to blue in last sc of R3 (6)
R4: now working in blue, inc once then sc around (7)
R5 – R8: sc around, lightly stuffing arm as you work
Fasten off and leave tail for sewing. Attach either arm to sides of body with whip stitches, then secure lower part of arm by tacking to body. Tie knot and weave in remaining tail.
Feet
Make two using white yarn
R1: ML 6sc
R2: *sc, inc* (9)
R3 – R4: sc around
Fasten off, leaving long tail for sewing. Lightly stuff each foot, then use tail to whip stitch to body.
Complete!

I hope that this video tutorial + pattern was helpful to you! I would be so grateful if you would consider giving my YouTube channel a follow – I am planning on continuing to add cute video tutorials, and hope to eventually be able to poll my followers for pattern and tutorial ideas.
I worked really hard on this pattern, both refining it into easy to read steps and filming and editing the video! Legal stuff: Please don’t sell/redistribute this pattern or pass it off as your own – feel free to share it by sharing my blog with others! I have social media share buttons at the bottom of every post.
You can sell items made from this pattern, but you must credit me as designer on the listing!
I would also love to see what you make – if you post to Instagram, tag me @pixeledpeach so I can like and comment!

-Missy

