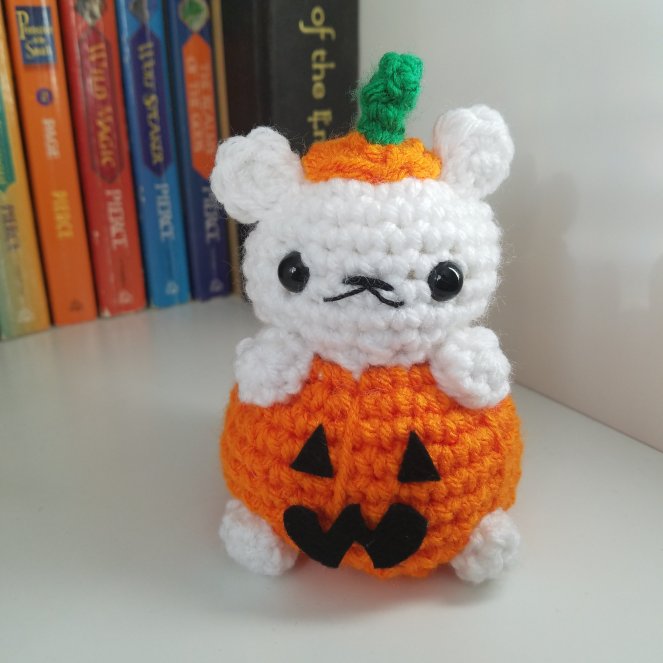
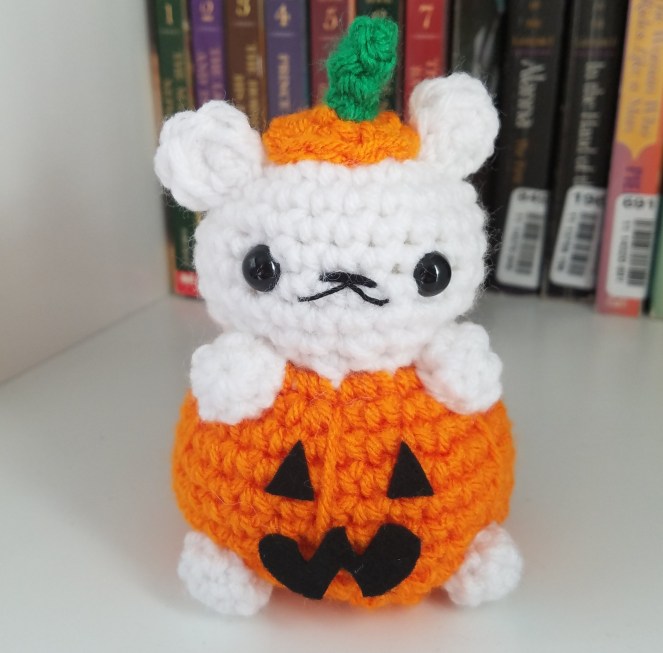
Here’s another free pattern I whipped together really quickly the other night – I’ve been strangely motivated to make Halloween themed amigurumi projects! I made an ice cream bear awhile back, and thought to maybe add in another themed bear or two to the collection. So here’s the latest edition: Pumpkin Bear!
You’ll need:
- White, orange, and green worsted weight yarn (again, I’m obsessed with Hobby Lobby’s “I Love This Yarn!” so that’s what I’ve used)
- black felt and a hot glue gun (for the pumpkin face!)
- 9mm safety eyes
- black crochet thread, or embroidery floss for the nose and mouth
- fiberfill stuffing
- sharp darning needle/tapestry needle
You should also know how to ML! There are tons of great tutorials on Magic Loop if you don’t know how.
Bear Body
in white, ML 6sc
Row 1: inc in all sts (12)
Row 2: *sc, inc* around (18)
Row 3: *2sc, inc* around (24)
Row 4 – 8 (5 rows total): sc around
Row 9: *2sc, dec* around (18)
Row 10: *sc, dec* around (12)
In last loop of last decrease in Row 10, pull through orange yarn. Cut white yarn long, and work tail end in. Note: this is how I work my color changes – if you do yours differently, go right ahead!
now in orange yarn
Row 11: inc in all sts (24)
Row 12: *3sc, inc* around (30)
Row 13 – 18 (6 rows total): sc around
Row 19: *3sc, dec* around (24)
Row 20: *2sc, dec* around (18)
Row 21: *sc, dec* around (12)
Add the face and stuff the bear’s head and pumpkin body here. I added the eyes between rows 6 and 7, and about 4 sts apart. I usually sew the mouth by running two flat stitches as centered between the eyes as I can, then adding gentle curves underneath! Be careful not to stuff the pumpkin too much, or you won’t be able to cinch it correctly later. It should be stuffed so that it’s still slightly squashy.
Row 22: dec in all sts (6)
Fasten off, and leave a long tail for sewing and adding the pumpkin shape (I saved about 16 inches, because I hate running out of yarn.) Sew through each of the remaining 6 sts and pull tight to close. Next, sew one very long stitch along the outside of the pumpkin, from bottom to the very first orange row. Pull the stitch tight, but not so tight that the body flattens out. Sew 4 – 5 more long stitches around the orange pumpkin body, then tie a knot and sew in the remaining tail.
Pumpkin Cap
In orange, ML 6sc
Row 1: inc in each st (12)
Fasten off, and leave a long tail.
Stem – ML 3sc
This is a little fiddly, but if you work loosely you’ll have an easier time with it.
Row 1 – 2: sc in each st
Fasten off, and use the tail from the stem to sew the stem to the pumpkin cap.
Attach the pumpkin cap to the top of the bear’s head using the orange tail. Be careful sewing – try to hide your stitches so that it doesn’t look like Frankenstein attached the hat!
Paws – make 4
in white, ML 6sc
Row 1: sc around
Fasten off, and use the tail to sew each paw to the body. The top paws are partially sewed to the body, partially sewed to the head. Be sure to sew the paws on wider than you set the eyes on the face – I don’t know why, but it looks cuter that way!
Ears – make 2
in white, ML 6sc
slip st to the first ML sc, and fasten off. Use the tail to sew the ear to the bear’s head, on either side of the cap. Pull the starting tail very tight to close your work, then cut it close to the fabric of your work to hide it.
If you would like to add the pumpkin’s face, use the black felt to cut two triangles for the eyes and a jack-o-lantern mouth – hot glue them to the pumpkin, just below where the top paws connect.
All done! If you make this project, share it with me on Instagram so I can see how you did – I’m @pixeledpeach
Feel free to share, comment, post, and pin – but don’t redistribute or sell this free pattern as your own, and link back to my blog! You can sell finished products made with this pattern, if you want; I appreciate credit as designer on your listings, if you would be so kind.


One thought on “Pumpkin Bear amigurumi pattern”