Fun fact: I’m actually allergic to bees – but that doesn’t mean I don’t like them! I understand how important they are, especially for pollination. And I love flowers, fruit, and honey, so bees more than make up for the pain of when I get stung.
I was trying to think of things I could do to make the world just a little bit better, but sometimes it’s hard to do anything, since I am but one humble person. So I did some research online, and found a site that accepts donations to help save the honey bees called the Honey Bee Conservancy – they look really awesome and have helped a ton with the bee crisis, plus provide education on the importance of bees. So, I decided to make and sell these sweet little bee plushies in my shop and also release a pattern for others who would like to make them and donate to the Honey Bee Conservancy!
Required Materials:
- 5mm crochet hook
- worsted weight yarn in black and yellow
- 9mm safety eyes
- white felt
- hot glue gun
- tapestry needle
- scissors
- black pipe cleaner
Stitches & Abbreviations
| ch | chain stitch |
| sc | single crochet |
| inc | increase |
| dec | decrease |
| ** | repeat what’s in between “**” as directed |
| sl st | slip stitch |
Body
in yellow, ch 2
Round 1: 6sc in first ch
Round 2: inc in each stitch (12)
Round 3: *sc, inc* around (18)
Round 4: *2sc, inc* around (24)
Round 5-6: sc around
Round 7: switch to black, sc around
Round 8-9: switch to yellow, sc around
Round 10: switch to black, sc around
Round 11-12: switch to yellow, sc around
Round 13: switch to black, sc around
Round 14: switch to yellow, *2sc, dec* around (18)
Round 15: *sc, dec* around (12)
Round 16: switch to black, dec in all stitches (6)
Sl st to next stitch, then cut yarn and pull through to fasten off. Leave a long tail for sewing.
Assembly
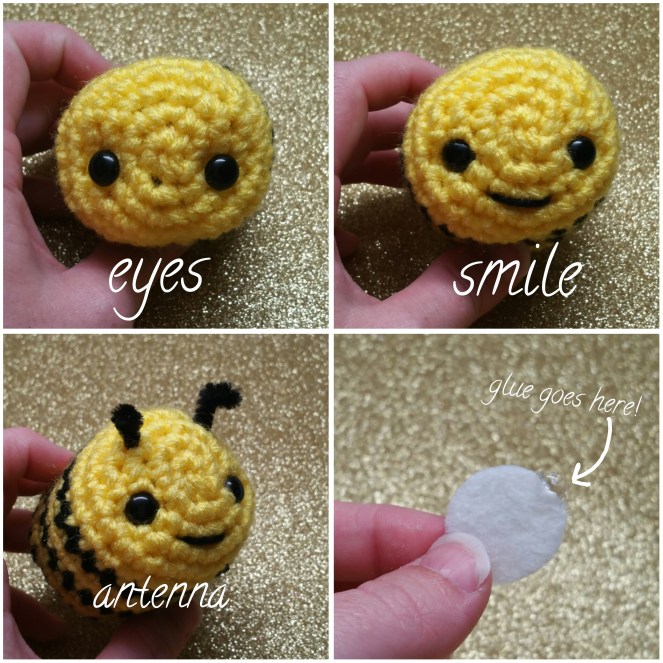
- Attach safety eyes to the front of the bee’s face, in between rounds 3 & 4 and an inch apart.
- Next, stuff the bee and use the tail to cinch the opening closed by sewing through each stitch and pulling tight. Tie a knot and weave the tail in.
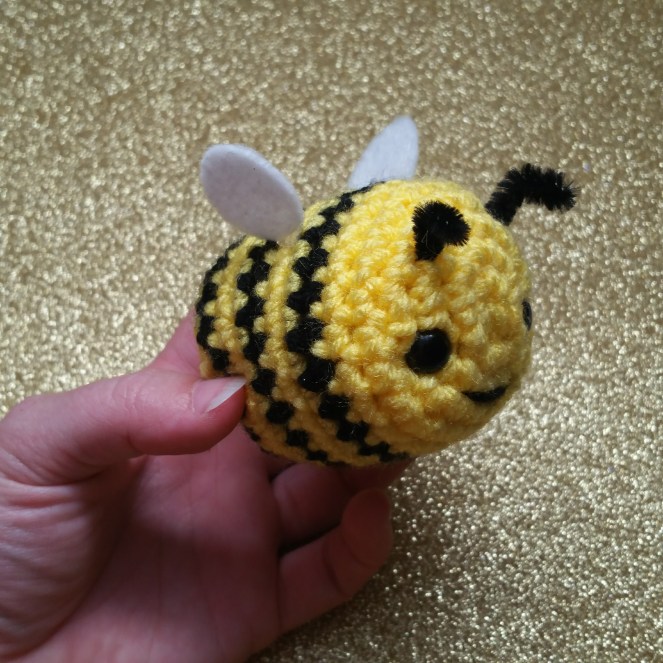
- Cut the pipe cleaner so it measures 3”. Poke it through the bee’s face, and out through another stitch on the face. Roll the tips down and bend them so they look like antennae.
- Cut two tiny circles out of the felt (about ¾” in diameter) and hot glue them to the body, so they stand upright. I attach mine on the center black stripe and even with the antennae.
- Last, embroider a small smile on the front of the bee’s face with a bit of black yarn.
Complete! Hope you enjoyed the pattern!
For anyone interested in a really nice .PDF version of this pattern, as well as more really clean and easy to follow patterns, I have a Patreon! I update pretty regularly, and add 2 (or more) patterns each month to my account, plus take plush requests and even write custom amigurumi patterns! If you enjoy my patterns, please consider become a patron! (I would really appreciate it!)
Happy Crafting!
–Missy
legal stuff: You can sell finished products, but please don’t sell or distribute this pattern! I would love a credit back to me as the designer, too, if it’s not too much trouble!


He’s a real cutie, and for such a good cause!
Unfortunately I get an error message from your Patreon link. 😦
LikeLike
Ah! Not sure what’s going on, but the URL for it is:
http://www.patreon.com/craftchampion
LikeLiked by 1 person
Thanks!
LikeLike