I’ve been playing a lot of Stardew Valley lately (what with the new update and all that came out!) – in addition to playing Stardew, I’ve also been trying to gear up for the summer farmer’s market season. Unluckily for me, the weather looked bad for this upcoming weekend, so I’m forgoing the market I had planned this Saturday. Hopefully I’ll be able to go sometime soon, but it may need to wait until the end of the season.
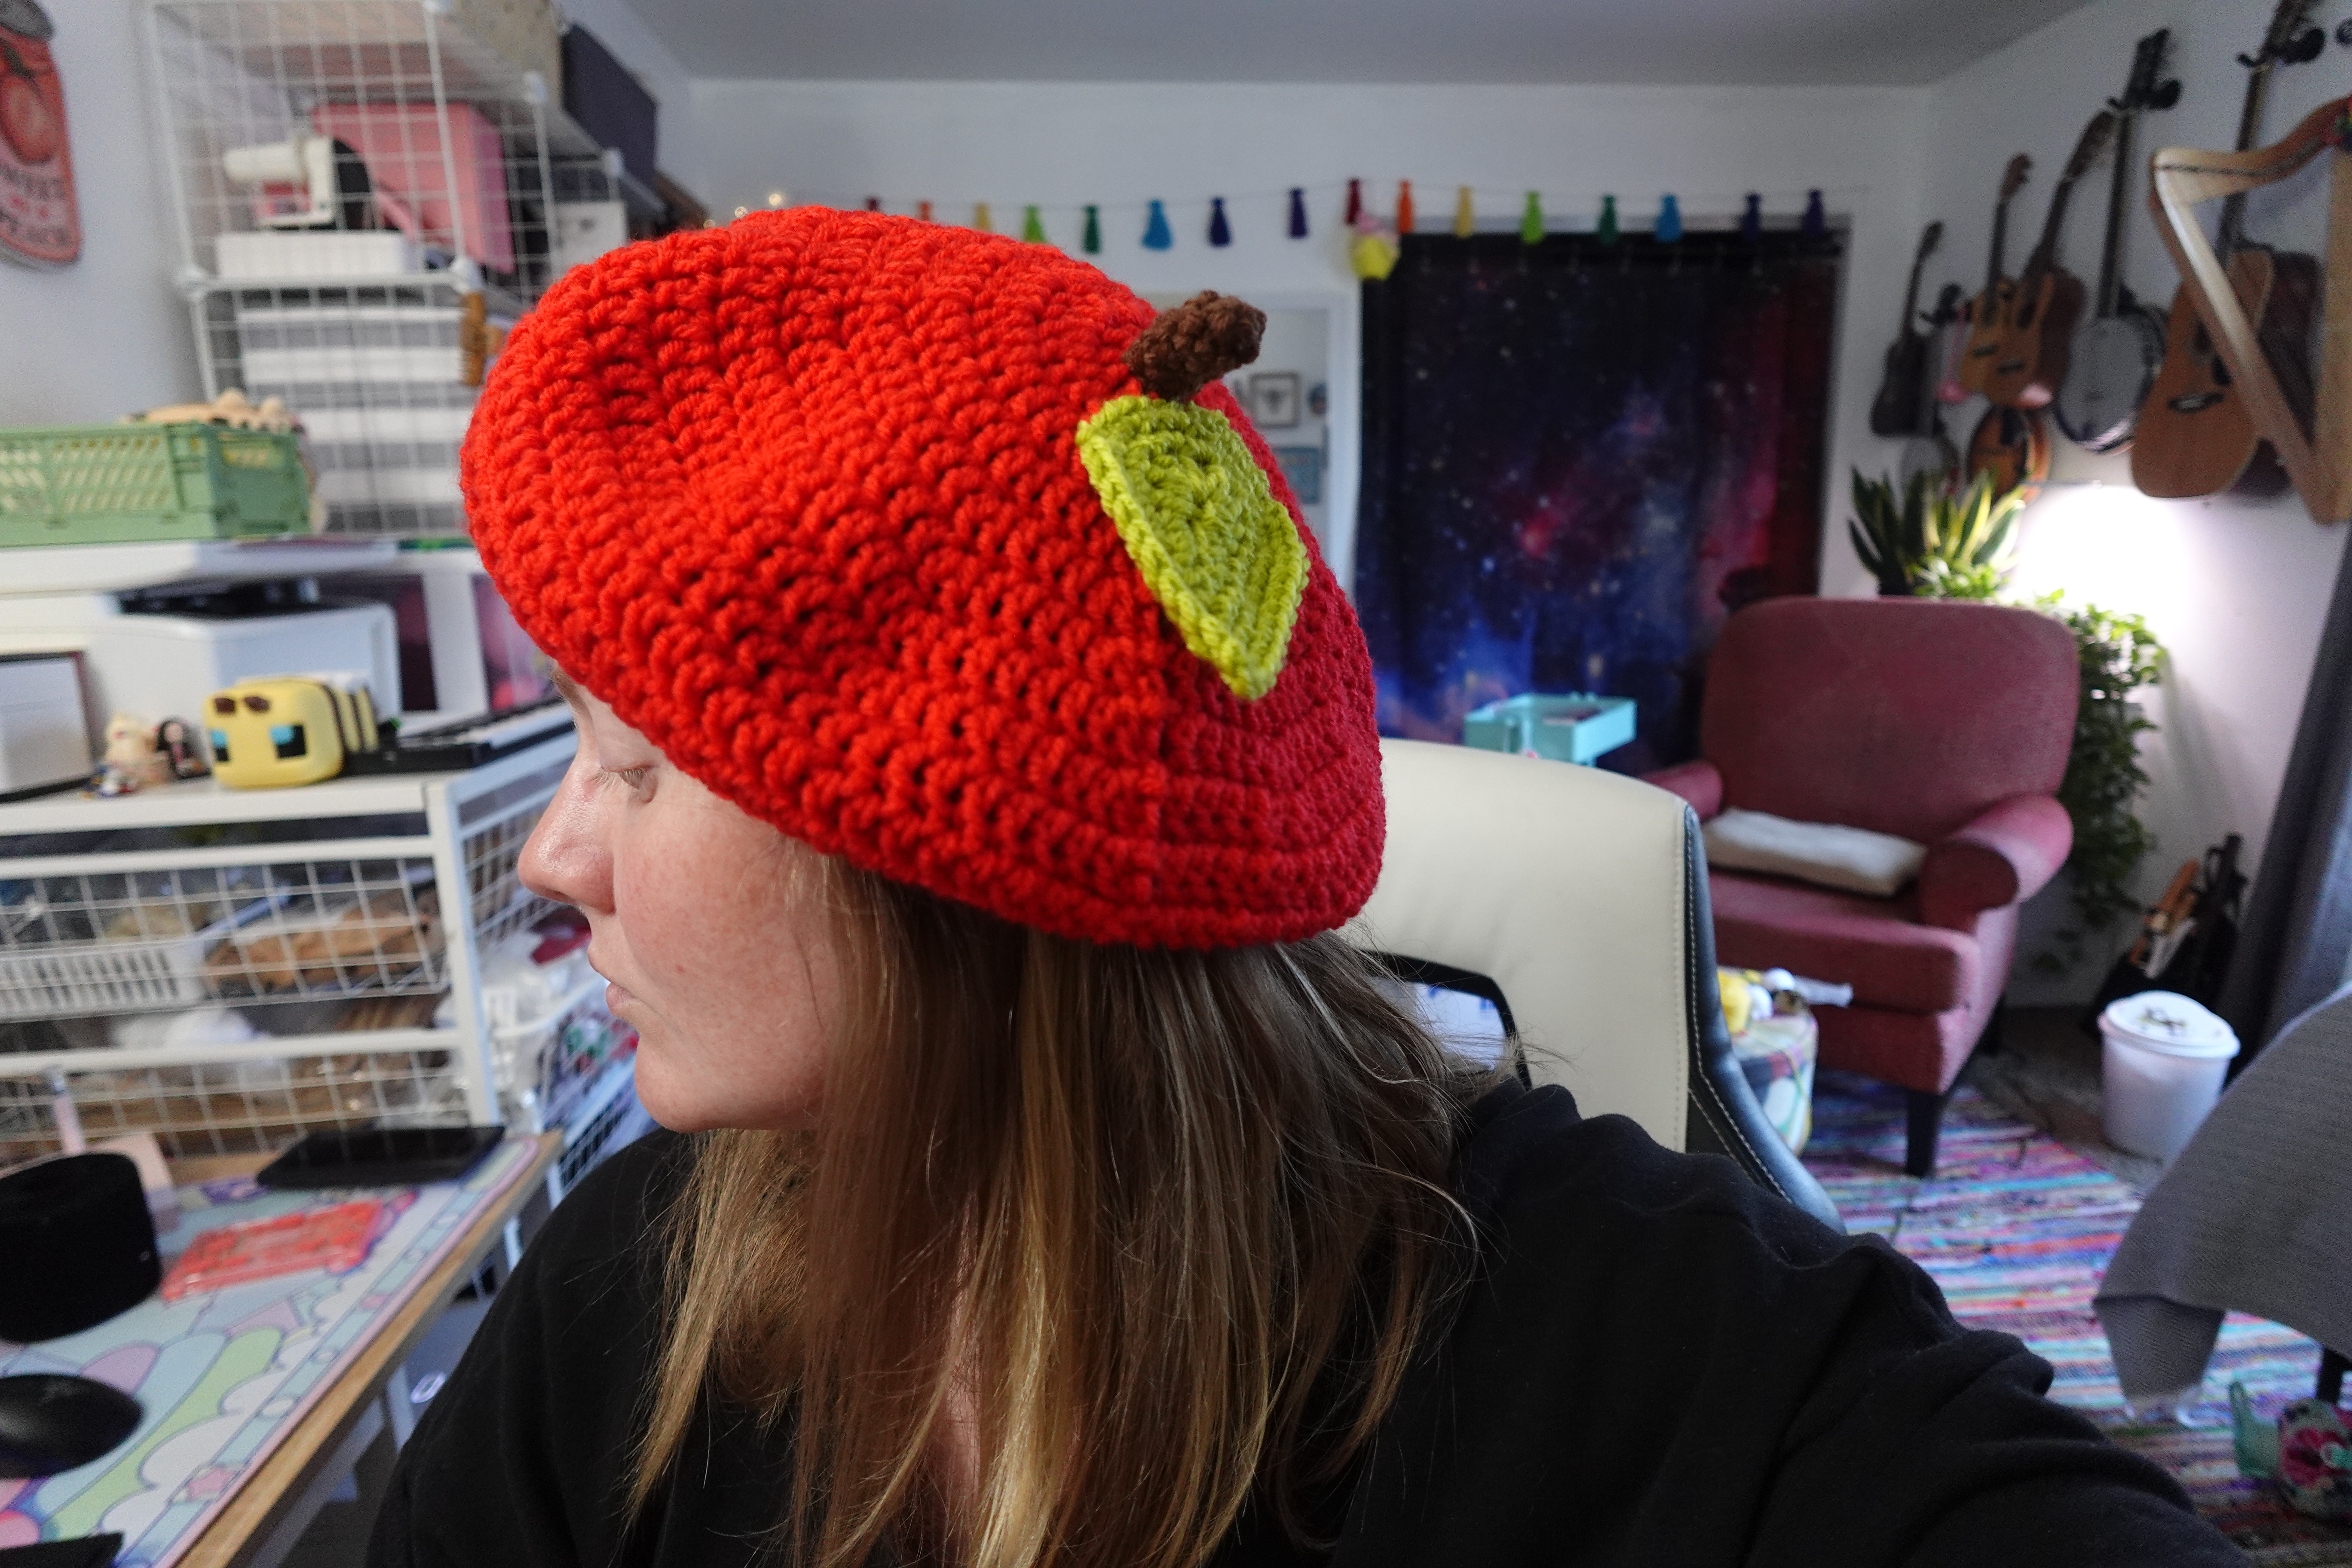
One of the things that I thought would be really cute to try at the market is this fruit beret! It’s made with worsted weight yarn and a larger crochet hook, so it’s light enough to wear in the summer, and it’s got a little leaf and stem attachment that makes it look like an apple, or peach, or blueberry, depending on the main color that you use!

YouTube Pattern Video
Below you’ll find the pattern video. I’ve very recently started using YouTube’s “Chapters” feature to sort each individual instruction (rounds, sewing, sections, etc.) into a time stamped section. You should be able to see the chapters in the timeline/seek bar of the video below, but if you click over to YouTube, you’ll be able to pull the chapters up and move more easily between them.
As always, with the pattern write-up here on my blog, the written instructions are “bare bones” – they’re designed to work hand-in-hand with the video tutorial. With the addition of the chapters feature, it’s even easier to navigate the pattern. For example, if you’re struggling with Rnd 3 of the body, you can click directly on the chapter “Rnd 3” and crochet it along with me.
Gauge
Since this is a worn item, I made a double crochet swatch of 10 sts over 5 rows with the recommended size hook (5.5mm). It measured 3 x 3 inches (or 7 x 7 cm) unstretched – I recommend making a test swatch and measuring. If your swatch comes out larger than mine, size down on your hook. If it comes out smaller, size up on your hook.
To make a swatch, chain 10 sts plus 2 to turn, then double crochet for five rows. Then, using a ruler, measure your swatch’s length and height. If it’s larger than my swatch measurement, size your hook DOWN. If your swatch is smaller than my swatch, size your hook UP.
I highly recommend checking your gauge so you don’t end up with a hat that doesn’t fit you well! I’ve crocheted a cardigan once without creating a swatch and BOY was that thing JUMBO when I was done (to the point it didn’t fit me and rather than frog it I just tearfully threw it into the trash). But you do you!
Materials
✩ Worsted weight yarn in main color (I’m using red, choose whatever color you’d like for your beret), green, and brown
✩ 5.5mm crochet hook for your beret (or whatever size needed after making swatch)
✩ Your standard amigurumi/crochet items: tapestry/yarn needle(s), stitch marker, scissors
Pattern Notes
All of my patterns are written with US terminology.
As with most amigurumi projects, your work will be formed by crocheting in a continuous spiral, with a stitch marker marking the beginning of each round. Any other construction style will be indicated in the pattern!
Abbreviations
These are my most commonly used abbreviations. Any special stitches or exceptions will be denoted in the pattern!
| rnd(s) | round(s) |
| sc | single crochet |
| MR | magic ring |
| ( ) | number of stitches at the end of each round |
| * * | repeat instructions, in the order they appear, the indicated amount of times |
| inc | increase (typically single crochet – otherwise denoted) |
| BLO | work in the back loop only |
| FLO | work in the front loop only |
| slp st | slip stitch |
| dc | double crochet |
| hdc | half double crochet |
| ch | chain |
| st(s) | stitch(es) |
Pattern
Beret
In main color, form Magic Ring
Rnd 1: ch 3 (serves as first dc st here and throughout the pattern), 11 dc, slp st to top of ch 3 to close round (12)
Rnd 2: ch 3, dc in in same st ch is coming out of, dc inc in each st around, slp st to top of ch 3 to close round (24)
Rnd 3: ch 3, dc inc in next st, *1 dc, 1 dc inc* around, slp st to top of ch 3 to close round (36)
Rnd 4: ch 3, 1 dc in next st, dc inc in next st, *2 dc, 1 dc inc* around, slp st to top of ch 3 to close round (48)
Rnd 5: ch 3, 1 dc in next 2 sts, dc inc in next st, *3 dc, 1 dc inc* around, slp st to top of ch 3 to close round (60)
Rnd 6: ch 3, 1 dc in next 3 sts, dc inc in next st, *4 dc, 1 dc inc* around, slp st to top of ch 3 to close round (72)
Rnd 7: ch 3, 1 dc in next 4 sts, dc inc in next st, *5 dc, 1 dc inc* around, slp st to top of ch 3 to close round (84)
Rnd 8: ch 3, 1 dc in next 5 sts, dc inc in next st, *6 dc, 1 dc inc* around, slp st to top of ch 3 to close round (96)
Rnd 9-12 (or add additional rows for a slouchier beret): ch 31 dc in each st around, slp st to top of ch 3 to close round
Rnd 13: ch 3, 1 dc in next st, dc2tog, *2 dc, dc2tog* around, slp st to top of ch 3 to close round (72)
dc2tog – *YO, insert hook into next st, YO, draw 1 loop through fabric of your work. YO, and draw loop through two loops on hook. * Repeat instructions between ** a second time, then YO and draw through all three loops on hook.
Rnd 14: ch 3, dc2tog, *1 dc, dc2tog* around, slp st to top of ch 3 to close round (48)
Rnd 15: ch 1, 3 sc, 1 sc dec, *4 sc, sc dec* around (40)
Rnd 16: Place 1 sc in slp st from rnd 14, and in the ch 1 from beginning of rnd 15. Then, sc around (41)
Fasten off by slp st to next st. Weave in this tail and MR tail here.
Leaf
In green, ch 6
Rnd 1: In 2nd ch from hook, slp st, then sc, hdc, hdc + dc in next st, 3 dc in last ch. Working down other side of ch, 3 dc, dc + hdc in next st, then sc, slp st, then sc top of leaf closed by working in first slp st on other side.
Rnd 2: Ch 2, then place sc in same st ch is coming out of (1st slp st from rnd 1). Sc in next 5 sts, then place 1 sc inc in next 6 sts. Sc in next 6 sts, then sc in space left from the ch 2 used to start this round (25)
Rnd 3: Ch 2, then place sc in same st ch is coming out of (under the ch 2 from rnd 2). Sc in next 5 sts, then *1 sc, sc inc* x 6. Sc in next 7 sts. Then sc in ch 2 space from beginning of rnd 3 (32)
Rnd 4: ch 2, then place sc in same st ch is coming out of (under the ch 2 from rnd 3). Sc in next 6 sts. Then *2 sc, inc* x 3. Slp st in next st, and fasten off (rest of rnd is unworked!).
Fasten off and leave a long tail for sewing.
Stem
In brown, form a MR
Rnd 1: 6 sc in MR
Rnd 2-5: sc in each st around
Fasten off and leave a long tail for sewing.
Assembly
Attach stem to MR center on beret using tail from stem.
Once the stem is attached and ends are woven in, attach leaf using tail from leaf so it sits directly beside the stem. I like to position my leaf so it helps cover the “jog” from the chs we made to start the beginning of each rnd on the beret – but you don’t need to!
Complete!
As always, thanks for tuning in. If you haven’t already checked out my YouTube page, I’d be forever grateful if you’d consider subscribing or watching my other tutorial videos. I try to post twice a month with a new tutorial!
Normal, obligatory legal banter:
Please, if you’d like to share this pattern, link folks directly to this blog page, or to the video on YouTube. I work really hard on my patterns and post them for free – please don’t copy my stuff and sell it as your own pattern! You can make and sell this pattern – and while I would love a mention on the listing or a link back to my blog, it’s not a requirement.
Have an Instagram and want to post your new make? Tag me (@pixeledpeach) so I can see and promote your page!

-Missy

