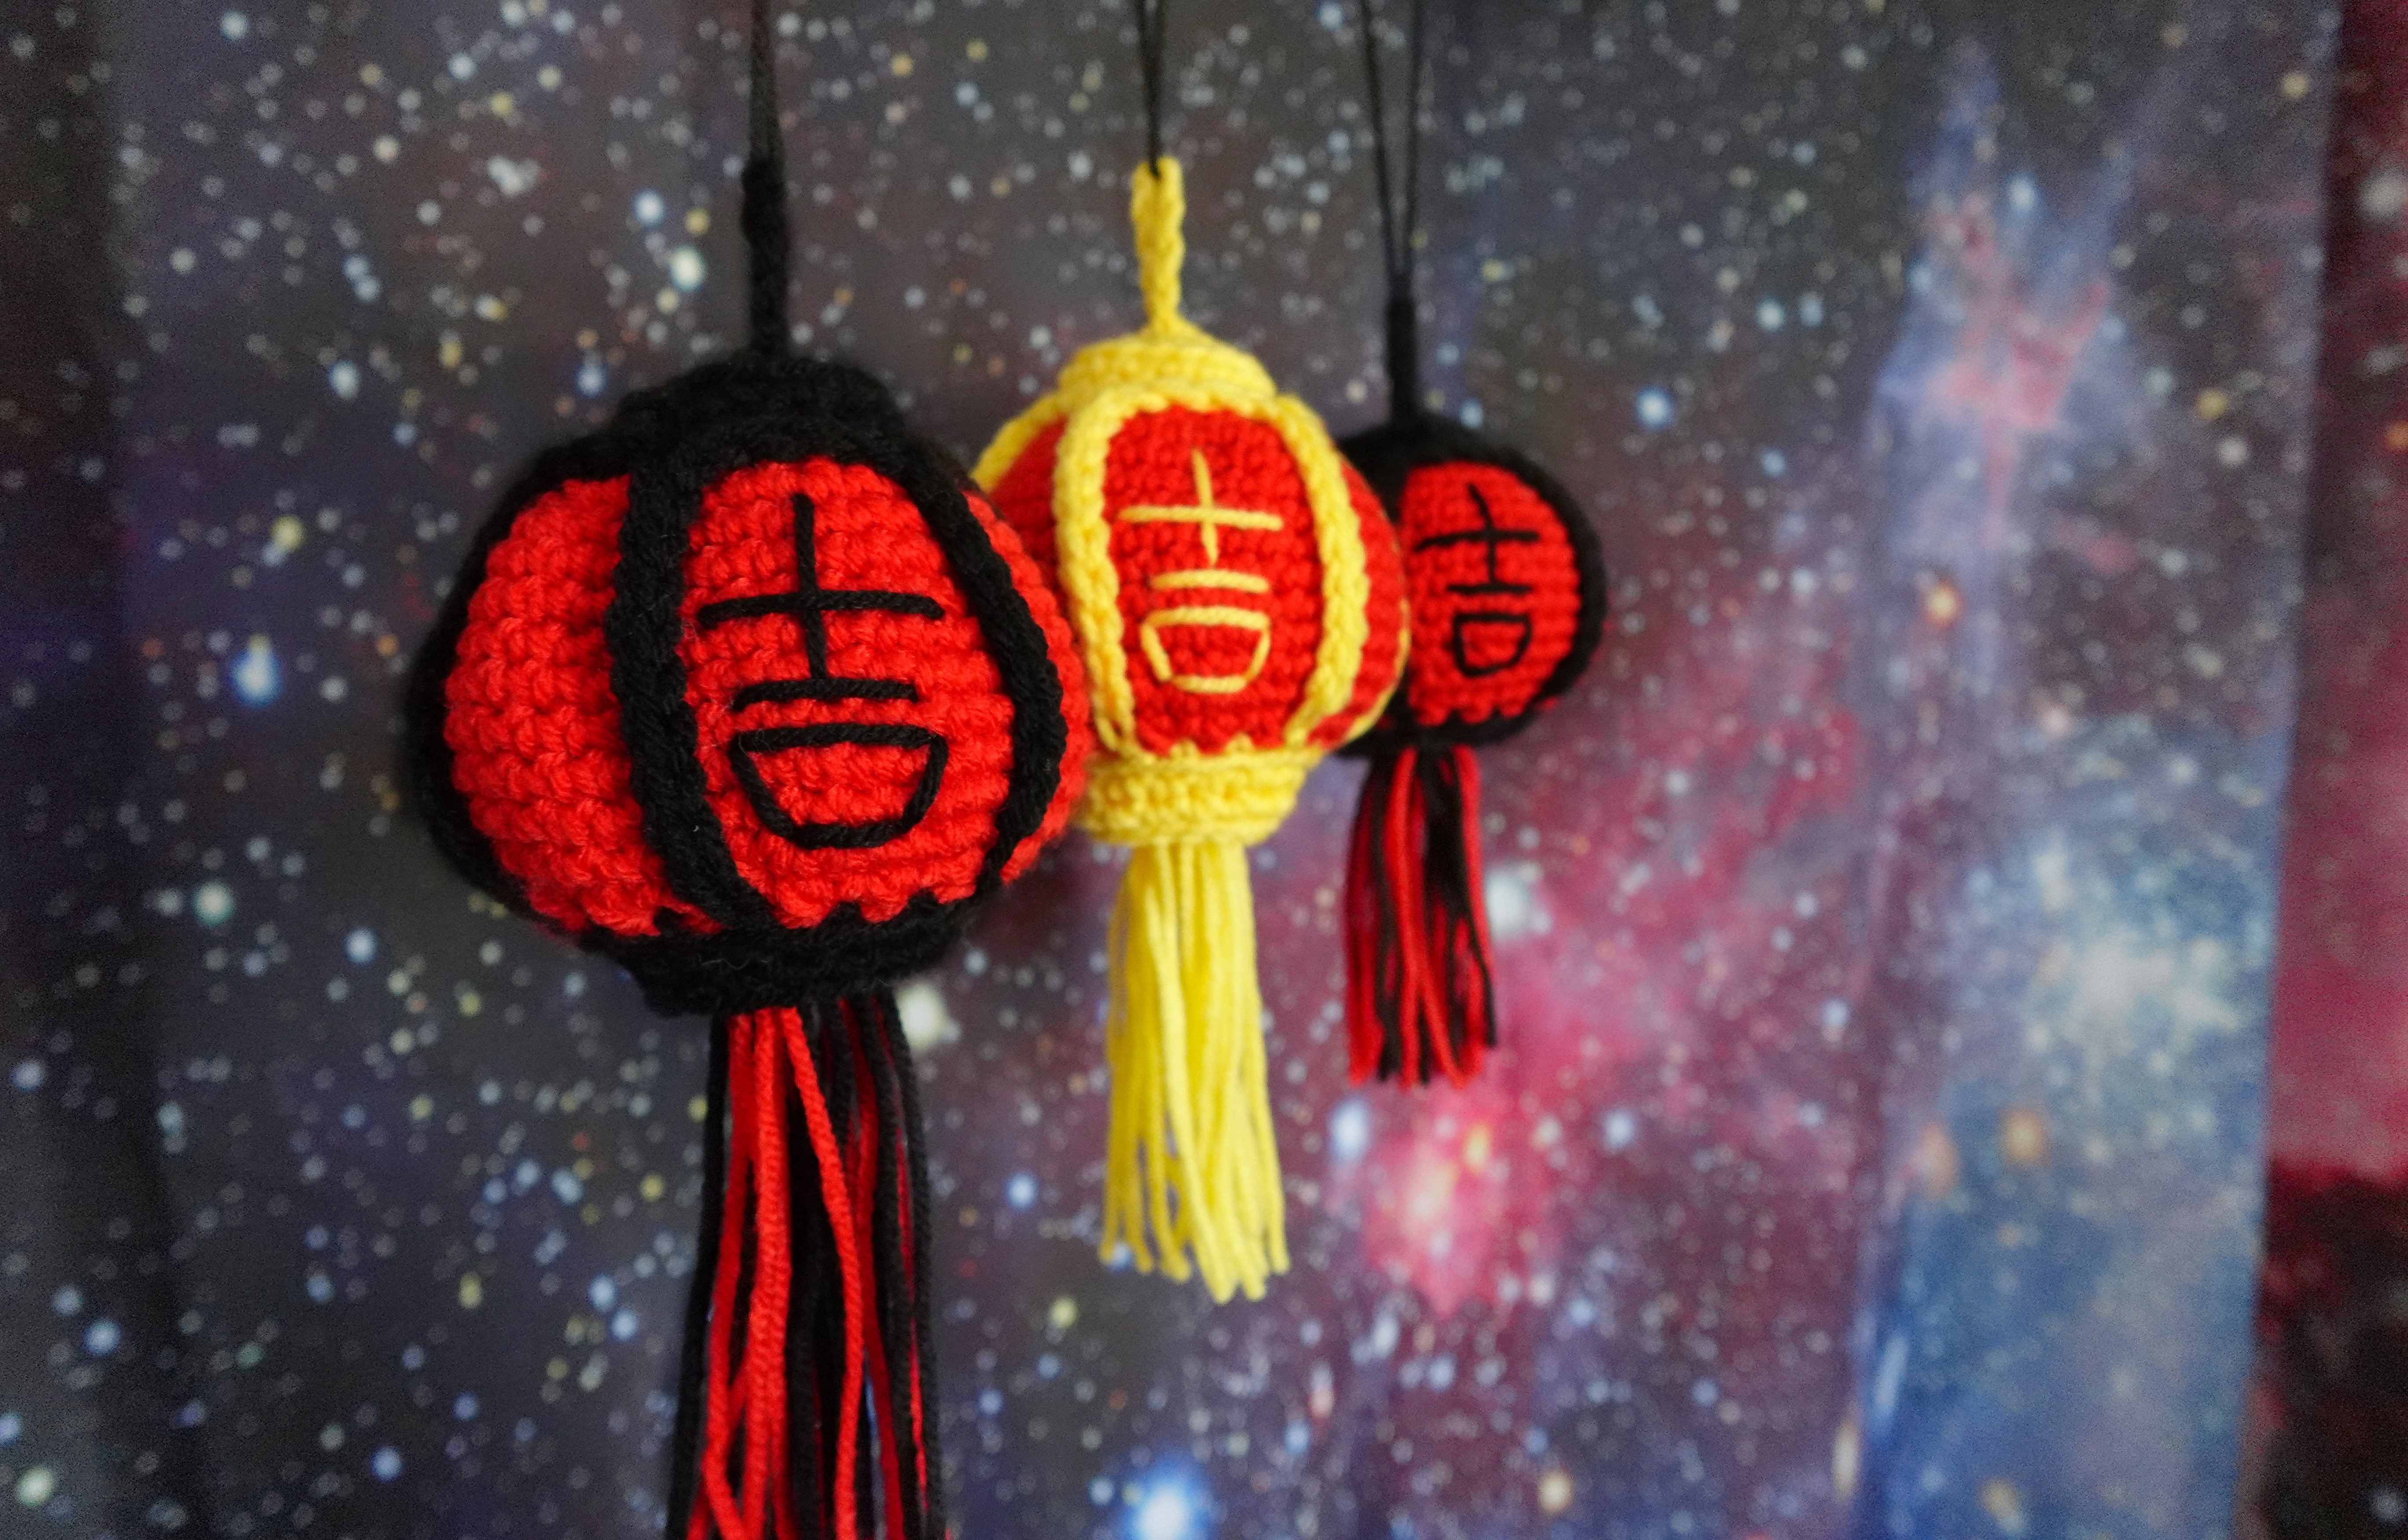
I’m very excited to have been accepted into an event in my area called the “Red Lantern City Night Market.” I want to pay homage to a culture that I really respect by creating amigurumi designs that align with the event’s theme – and naturally, a red lantern was one of the first ideas that came to mind.
I am super proud of how this one turned out, primarily because it doesn’t involve very much sewing. I managed to come up with a way to make the little cord embellishments on the top of the lantern that stretch down to the bottom all in ONE PIECE that you crochet together rather than sew. So other than the embroidery (which is optional!) and attaching the tassel, there’s virtually no sewing in this piece!
YouTube Pattern Video
Below you’ll find the pattern video. I’ve very recently started using YouTube’s “Chapters” feature to sort each individual instruction (rounds, sewing, sections, etc.) into a time stamped section. You should be able to see the chapters in the timeline/seek bar of the video below, but if you click over to YouTube, you’ll be able to pull the chapters up and move more easily between them.
As always, with the pattern write-up here on my blog, the written instructions are “bare bones” – they’re designed to work hand-in-hand with the video tutorial. With the addition of the chapters feature, it’s even easier to navigate the pattern. For example, if you’re struggling with Rnd 3 of the body, you can click directly on the chapter “Rnd 3” and crochet it along with me.
Materials
- Worsted weight yarn in red (main color) and black (accent color), or your choice of weight and color – just remember to size hooks and accessories accordingly.
- 4mm crochet hook (or whatever size you need, based on the weight of yarn you choose)
- Your standard amigurumi items: tapestry/yarn needle(s), stitch marker, scissors, stuffing
- Optional for making tassels: A scrap of cardboard to help wrap a tassel!
Pattern Notes
All of my patterns are written with US terminology.
As with most amigurumi projects, your work will be formed by crocheting in a continuous spiral, with a stitch marker marking the beginning of each round. Any other construction style will be indicated in the pattern!
Abbreviations
These are my most commonly used abbreviations. Any special stitches or exceptions will be denoted in the pattern!
| rnd(s) | round(s) |
| sc | single crochet |
| MR | magic ring |
| ( ) | number of stitches at the end of each round |
| * * | repeat instructions, in the order they appear, the indicated amount of times |
| inc | increase (typically single crochet – otherwise denoted) |
| BLO | work in the back loop only |
| FLO | work in the front loop only |
| slp st | slip stitch |
| dc | double crochet |
| hdc | half double crochet |
| ch | chain |
| st(s) | stitch(es) |
Pattern
Lantern:
Begin with accent color, form MR
Rnd 1: 6 sc in MR (6)
Rnd 2: *inc* x 6 (12)
Rnd 3: *1 sc, inc* x 6 (18)
Rnd 4: in BLO, sc around
Rnds 5-6: sc in each st around
Change to main color here, leaving accent color attached and at the front of your work. We’ll be coming back to it soon!
Rnd 7: in BLO, inc in each st around (36)
Rnd 8: *5 sc, inc* x 6 (42)
Rnd 9-16: sc in each st around
Rnd 17: *5 sc, dec* x 6 (36)
Rnd 18: dec in each st around (18)
Finish last sc st in Rnd 18 and pull the loop on your hook long. Cut a long main color tail, then attach back on to where the accent color is still attached to your lantern
Cord Embellishments:
Pull accent color through FLO directly to the left of where the working yarn is.
*Ch 11, in 2nd ch from hook place 1st slp st, slp st in next 9 sts (10 slp st total). Sc in next 3 sts* x 6, slp st in last st and fasten off. Weave in tail.
Attaching Cord Embellishments:
Color change to accent color on the last stitch of the lantern that we left with the loop pulled long.
Rnd 19: *insert hook in next cord embellishment, sc in next 3 sts of round* x 6 (18)
Rnd 20: in BLO, sc around
Stuff lantern here – remainder will be unstuffed.
Rnds 21-22: sc around
Rnd 23: in BLO, sc around
Rnds 24: sc around
Rnd 25: in BLO, *1 sc, dec* x 6 (12)
Rnd 26: *dec* x 6 (6)
Fasten off, leaving a very long tail – sew through FLO of remaining 6 sts of Rnd 26, then cinch closed. Tie a surface knot.
Push work in on itself – double over the FLO’s left behind from Rnd 23, and then again on the FLO’s left behind on Rnd 25.
Use long tail to help reinforce this shape – sew straight up through the lantern and through the MR at the top.
Then, fasten on here with your hook and ch 10 sts with this long tail. Slp st through the same space you fastened on, then tie another surface knot and weave the tail down to one of the panels of the lantern (between the cord embellishments).
Use the remainder of the tail to sew the character you’d like to the lantern. I used the kanji character for luck on my lantern, 吉 , because it fit nicely and was easy to embroider!
Making the Tassel
I use my phone case or a scrap of cardboard to make my tassels. First, I lay a scrap of yarn across the top of the cardboard – I’ll use this to tie the tassel at the middle and eventually secure it to the lantern.
Then, using accent color yarn, wrap 7-8 times around your cardboard, ending at the bottom of the cardboard (away from the scrap of yarn at the top).
Cut the yarn, then tie the scrap together at the top to secure all of the yarn into the tassel, folding it over so the scrap is at the center of the bundle of strands. Next, trim the wraps at the bottom of the cardboard (away from where you’ve tied the bundles together). Last, give each strand a trim so they’re all the same length.
Use the scrap we tied the tassel together with to attach to the lantern, right at the very last round (inside of the bottom of the lantern).
I sew one end of the scrap through the fabric of the lantern, then tie it to the other side of the scrap. Weave in both ends, or hide them within the other strands of the tassel.
Complete!
As always, thanks for tuning in. If you haven’t already checked out my YouTube page, I’d be forever grateful if you’d consider subscribing or watching my other tutorial videos. I try to post twice a month with a new tutorial!
Normal, obligatory legal banter:
Please, if you’d like to share this pattern, link folks directly to this blog page, or to the video on YouTube. I work really hard on my patterns and post them for free – please don’t copy my stuff and sell it as your own pattern! You can make and sell this pattern – and while I would love a mention on the listing or a link back to my blog, it’s not a requirement.
Have an Instagram and want to post your new make? Tag me (@pixeledpeach) so I can see and promote your page!

-Missy

