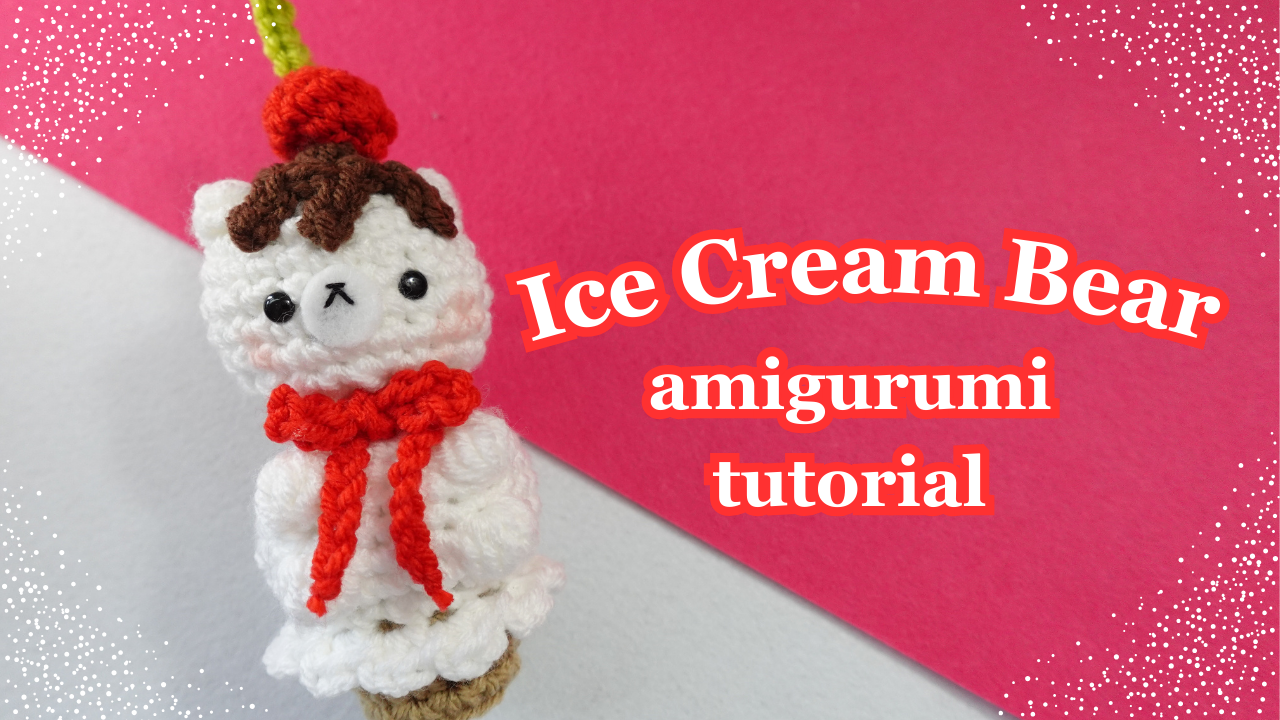
YouTube Pattern Video
As always, with the pattern write-up here on my blog, the written instructions are “bare bones” – they’re designed to work hand-in-hand with the video tutorial. With the addition of the chapters feature, it’s even easier to navigate the pattern. For example, if you’re struggling with Rnd 3 of the body, you can click directly on the chapter “Rnd 3” and crochet it along with me. For more info on how to use the chapters feature, please watch the “Navigation” section of the video. Like I mentioned, I walk you through how to best use this feature!
Yarns & Materials
✩ worsted weight yarn in white, dark brown, light brown, red, and green
✩ 4mm crochet hook (or whatever size needed, based on what weight yarn you are using!)
✩ scissors
✩ one pair of 6mm safety eyes – I get mine from “Glass Eyes Online” – they’re based in the US, and have so many different kinds to choose from! I super recommend checking them out (this isn’t a paid endorsement, they’re really just a great place to get eyes)! Here’s the link to the exact kind I use in this video.
✩ felt (optional)
✩ hot glue gun (optional)
✩ black embroidery floss
✩ embroidery needle
✩ tapestry needle
✩ stitch marker
✩ stuffing
✩ stuffing
✩ blush (optional)
Pattern
This pattern is written using US terminology!
Body:
Form MR
Rnd 1: 6sc in MR (6)
Rnd 2: inc in each st (12)
Rnd 3: 1sc, inc, 5dc bobble, inc, (1sc, inc) x 2, 5dc bobble, inc, 1sc, inc (18)
Rnd 4: (2sc, inc) x 6 (24)
Rnd 5-8: sc in each st around (24)
Rnd 9: (2sc, dec) x 6 (18)
Rnd 10: (1sc, dec) x 6 (12)
Add eyes, and stuff head here. Eyes go on between Rnd 6 & 7. Leave enough space for the mouth between.
Rnd 11: dec in each st around (6)
Rnd 12: place 4sc in each FLO around (24)
Rnd 13: sc in each st around (24)
Rnd 14: 13sc, 5dc bobble, 4sc, 5dc bobble, 5sc
Rnds 15-16: sc in each st around
Rnd 17: 14sc, 5dc bobble, 4sc, 5dc bobble, 4sc
Rnd 18: (2sc, dec) x 6 (18)
Rnd 19: (1sc, dec) x 6, pull through last dec with light brown, but leave white yarn attached and at the front of your work (12)
Rnd 20: in BLO, sc around (12)
Rnds 21-25: sc around
Stuff cone here
Rnd 26: in BLO, dec x 6 (6)
Fasten off, slp stitching to 1st FLO loop. Sew through all 6 remaining sts, cinch bottom closed, and weave in tail.
Add the “skirt” to the bottom of the bear’s body by using the white yarn we left attached. Pull white through first FLO left behind from Rnd 20, (ch 1, place 2hdc sts in same FLO you just chained out of, then in the next FLO slp st) repeat all the way around. Slp st to first FLO, then weave in end.
Mouth & Face
Using white felt and black embroidery floss, embroider mouth onto felt. Then, cut felt to a circle shape and paste on to bear’s face. If not using felt, embroider mouth directly on to bear’s face, between the eyes.
Add blush (if so desired).
Cherry Stem
In green, ch 6
In 2nd ch from hook, 5 slp st
Fasten off.
Cherry
In red, form MR
Rnd 1: 6sc in MR – pull stem through and then tighten MR
Rnd 2: inc in each st around (12)
Rnd 3: sc in each st around
Rnd 4: dec in each st around, tying MR tail and cherry stem tails together (6)
Fasten off, sewing last rnd closed. Save remaining tail to attach to frosting.
Frosting
In dark brown, form MR
Rnd 1: 6sc in MR (6)
Rnd 2: sc in next st, (ch 4, in 2nd ch from hook, 3 slp st, dec 1st sc and next sc together) repeat x 6, to form 6 frosting drips
Leave long tail for sewing. Sew cherry to frosting using cherry’s tail. Attach frosting to bear’s head using frosting tail. Weave in all ends.
Bow
In red, ch 44 sts. Fasten off, pulling both ends tightly to knot them, then trimming the ends short. Tie around bear’s neck to form bow.
Done!

As always, thanks for tuning in. If you haven’t already checked out my YouTube page, I’d be forever grateful if you’d consider subscribing or watching my other tutorial videos. I try to post twice a month with a new tutorial, and I’d like to begin polling my subscribers to see what kinds of tutorial videos they’d like to see!

-Missy

