Hey hi hello! Like I mentioned on my last post, I’m playing a little catch-up over here on the blogosphere, trying to add written patterns to each of my video tutorials.
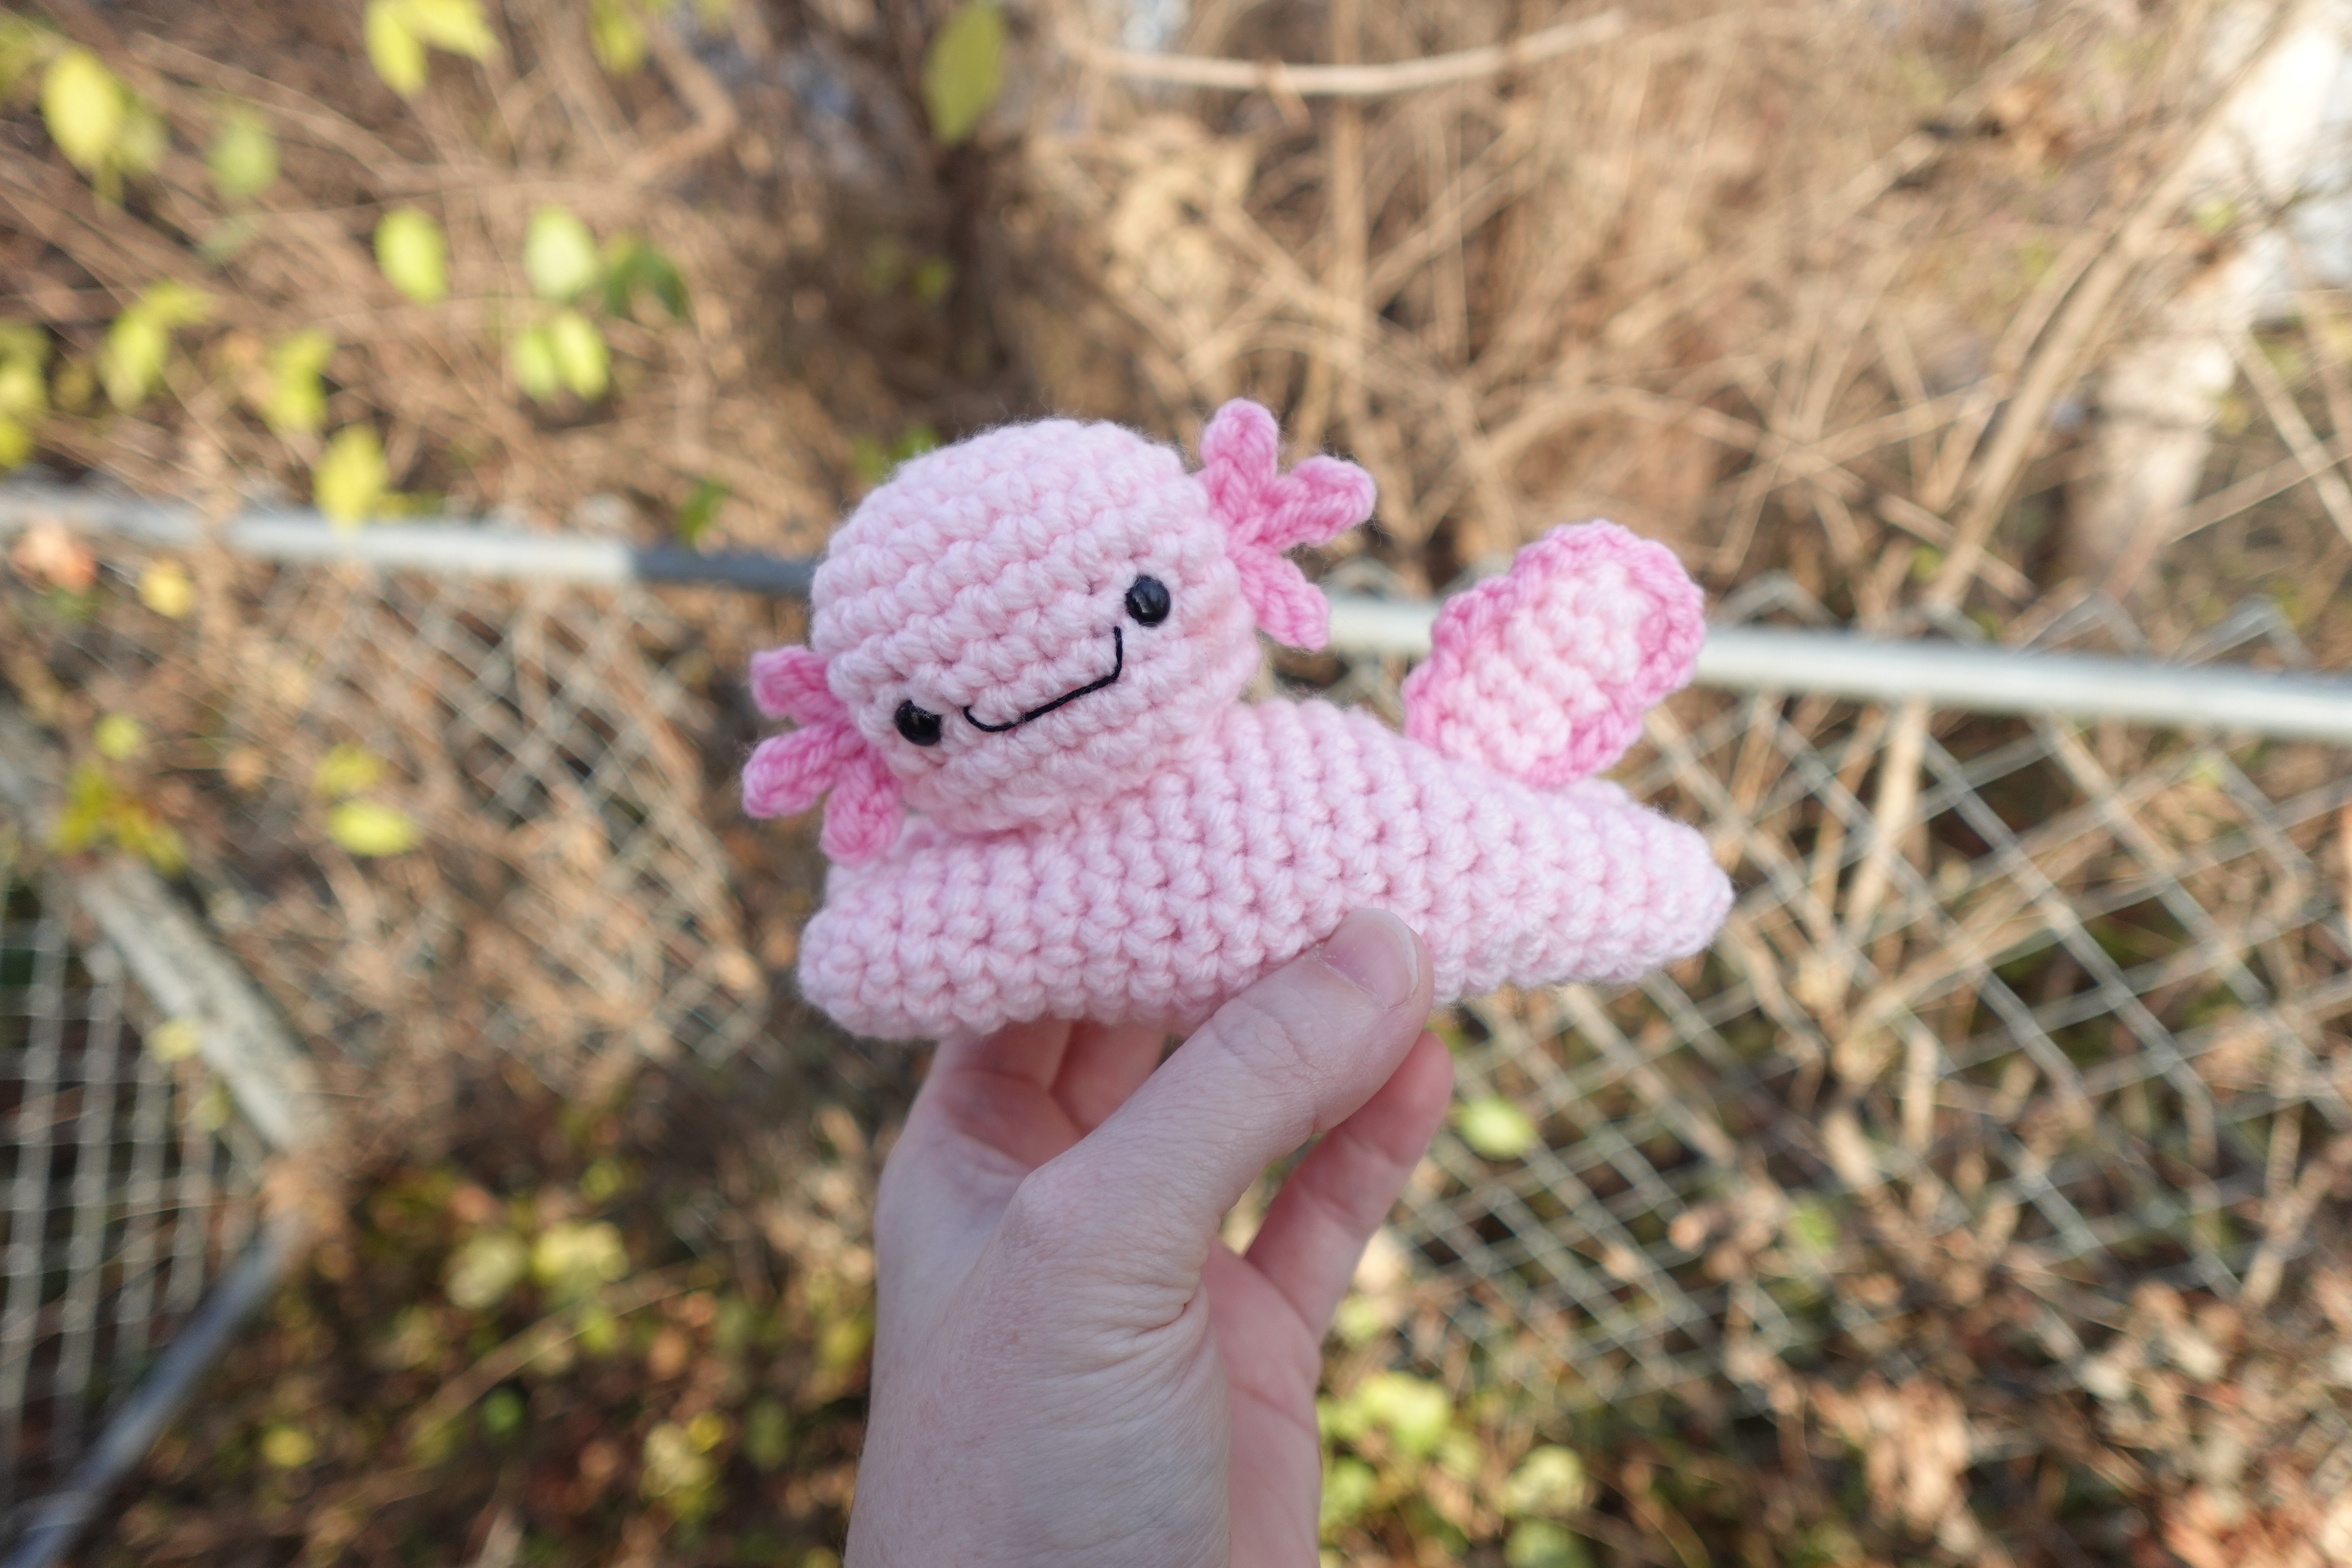
This one is for this little axolotl fellow – a new body shape I’ve been playing around with creating. I’ve made axolotls in the past:


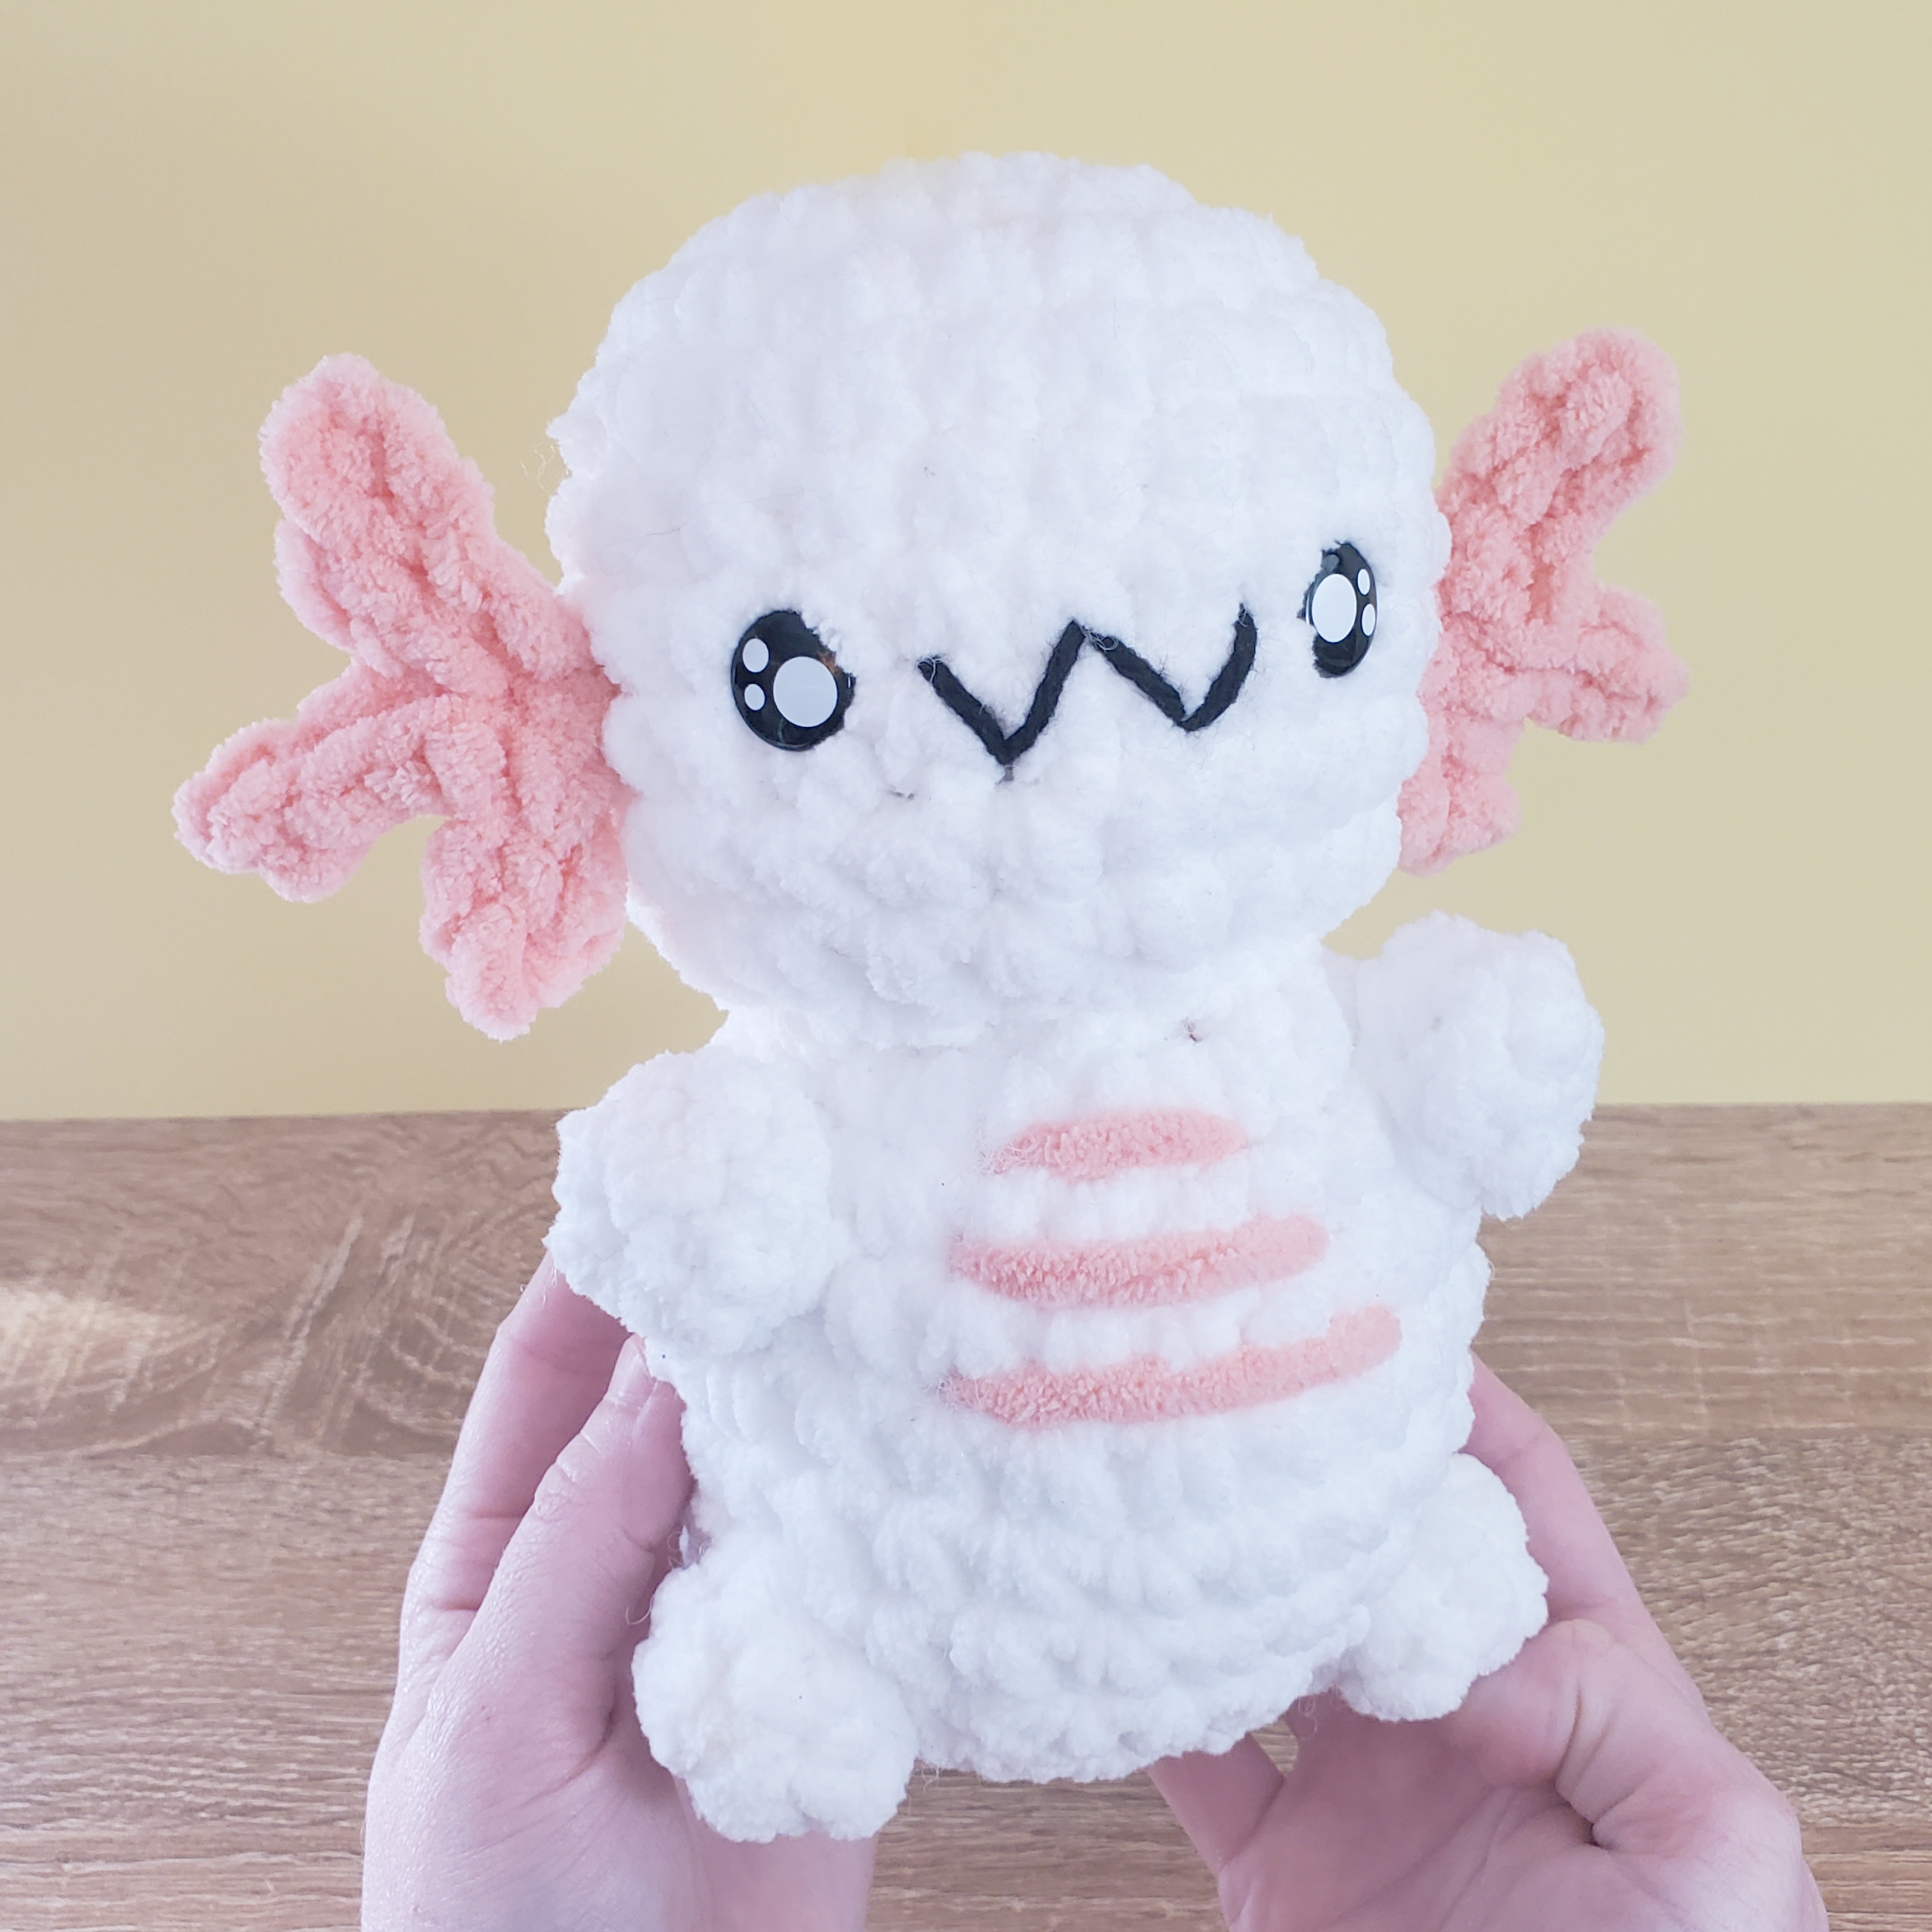
Well, some of those are Woopers (the Pokemon) but they count! However, I mostly make them in an upright sitting position, and I’ve never tried making them so they were lying down. Here’s the new body shape, with a few different examples!


Anyway, like I mentioned on previous posts, this post serves as sort of the formal “write up” of the amigurumi tutorial I posted on my YouTube. It’s a tidier version of my own personal notes, but is in no way a completed pattern, in that it has bare bones instructions and no guiding photos. My idea is that it’s supposed to work hand-in-hand with the video tutorial! If there is a section you’re not sure about in the write up, check out the video.
My reasoning for this? Well, to be honest, I’ve been really disappointed with pattern writing and publishing lately for several reasons:
- I spend countless hours laboring over taking great guiding photos and phrasing my instructions as clearly as possible – which is tedious and frustrating.
- I wind up with a huge document (we’re talking 10-20 PAGES for a 1 hour crochet project) that’s hard to share and impossible to transcribe to certain pattern sharing sites like Ribblr.
- This document still isn’t as clear as I want it to be. I am really picky about providing instruction, and usually prefer showing rather than telling anyhow.
- After going through this huge process of creating, testing, and making a pattern that folks said they were interested in… No one ends up purchasing the pattern. Sigh.
So I found this fills my bucket better. I get to create and share patterns that I want to make. I get to teach them the way I’m most comfortable teaching them. And I can then provide the less formal write up (the part I dislike cleaning up and publishing!) for crocheters who would prefer the written pattern. Plus, with the video to assist, the notes can be less clear anyway, as I’m physically making the item alongside you in the video tutorial.
I’m also tossing around changing some of my language and then creating a left-hand version of each pattern by mirroring the videos. I have friends and family members who are lefties and they feel really left out with the countless right hand versions of things but scant left hand versions. We’ll see – it’s on my radar, at the very least!
Alright, thanks for listening to my TED talk about pattern writing – I’ll get off of my soap box and get to probably the real reason you’re here: The pattern write up itself! (Seriously though, thanks for reading to this point. It’s been such a frustrating process with patterns lately, I needed to get that off of my chest.)
Lying Down Axolotl Tutorial
Here is the video tutorial for this pattern. Like I mentioned above, this is the de facto pattern: Everything you’ll need is contained in this video! If you find a place is a little unclear in the write up, check out the video. I’ve also sorted it in to chapters on YouTube, which can help you navigate to the section that you’re looking for a little more guidance in. Additionally, I’ve linked to the video in the write up below to help you out on the trickier sections.
Materials:
✩ 4mm crochet hook (or whatever size needed, based on what weight yarn you are using!)
✩ worsted weight yarn in main color and contrasting color (I’d recommend a lighter main color and darker contrasting color!)
✩ one pair of 8mm safety eyes (I order mine from here: https://rb.gy/jq2qh8)
✩ 2 stitch markers
✩ stuffing
✩ tapestry needle
✩ black embroidery floss
✩ embroidery needle
Body
Begin by forming a ML in main body color
Rnd 1: 8 sc in ML
Rnds 2-5: sc around (4 rounds total)
Fasten off by slip stitching. DON’T stuff leg yet – looks best when stuffed right before adding the back legs!
Make second front leg the same way:
Rnd 1: 8 sc in ML
Rnds 2-5: sc around (4 rounds sc total)
Don’t fasten this leg off. Instead, chain 1 stitch. Join the legs together by sc in the stitch you slipped stitched in on the first leg – work the tail from the first leg in as you work 8 sc around the first leg. (Really good place to reference the video – click here!)
Work over the back side of the chain, then continue by placing 8 sc in the second leg. Then, sc across the chain. (Should be 18 sc sts between the two legs and the front and back side of the chain.)
Rnd 2: *2sc, inc* x 6 (24)
Rnd 3-11: sc around (9 rounds sc total)
Rnd 12: *2sc, dec* x 6, and then any additional sc that you need to make to have your last sc be directly centered in the body.
Stuff here – push fluff to the tips of the front paws!
Divide work by 9 and 9 sts – Continue working around one side of the back leg for 4 rounds of sc, then stuff.
To close, *sc, dec* then fasten off.
Repeat on the second leg by fastening on and working 4 rounds of sc. Stuff, then *sc, dec* around. Fasten off!
Head
Form ML in main color
Rnd 1: 6sc in ML (6)
Rnd 2: *inc* x 6 (12)
Rnd 3: *1sc, inc* x 6 (18)
Rnd 4: *2sc, inc* x 6 (24)
Rnd 5-9: sc around (5 rounds sc total)
Rnd 10: *2sc, dec* x 6 (18)
Rnd 11: *1sc, dec* x 6 (12)
Set head aside for the moment – we’ll come back to it!
Axl Frill
In contrasting color, tie a slip knot, leaving a loooooong tail on the slip knot. We’ll come back for this tail!
Rnd 1: Ch 4, slp st 3, ch 4, slp st 3, ch 3, slp st 2 then pull the three strands together before slp stitching the middle and slip knot all together. (This is a really good place to reference the video – click here!)
For the head, attach the frills prior to closing up by tying the two ends together inside of the head.
Head, continued
After making both frills, embroider the face, add the safety eyes, stuff the head, and add the frills. Here’s another really good place to reference the video – click here to directly link to this section in the tutorial.
Rnd 12 of head: *dec* x 6 (6)
Fasten off by slip stitching, then use tail to sew head to body (no need to sew through the last 6 sts!). Attach head close to front legs, and facing out. Be careful not to scoot the head too far back on the body, or it looks like an abomination.
Tail
In main color, form ML
Rnd 1: 6sc in ML
Rnd 2-6: sc around (5 rounds sc total)
Flatten 6sc tube, and attach directly on to it through both layers with darker accent color. (Once again, click here for a link directly to this section in the tutorial! It’s really helpful!)
2sc in first st. Ch 1, then slp st to next. Continue that until you get to basically the top – place 5sc + ch 1 in the same stitch to flip over the top of the ML. Then, continue 2sc, ch, slp until you reach the bottom of the other side.
Use the tail left over from the tube to sew the bottom together, cinching in the colored part so it comes to a point. Then, attach – use the tail from the tail to sew the space between the back paws together!
Okay, I hope this write up was helpful for any written pattern lovers out there!
(ꈍᴗꈍ)♡ Happy crafting, friend! ♡(ꈍᴗꈍ)
-Missy

